Chances are your chickens are way overdue for a move. Most people keep their chickens in a classic coop and run, but that just so happens to be one of the most labor-intensive and unsanitary methods for housing chickens.
Since the 19th-century people have been moving things with rickshaws. By centering most of the “shaws” weight on the center of gravity of the two wheels and pulling the front, it’s easy to move incredible amounts of weight.
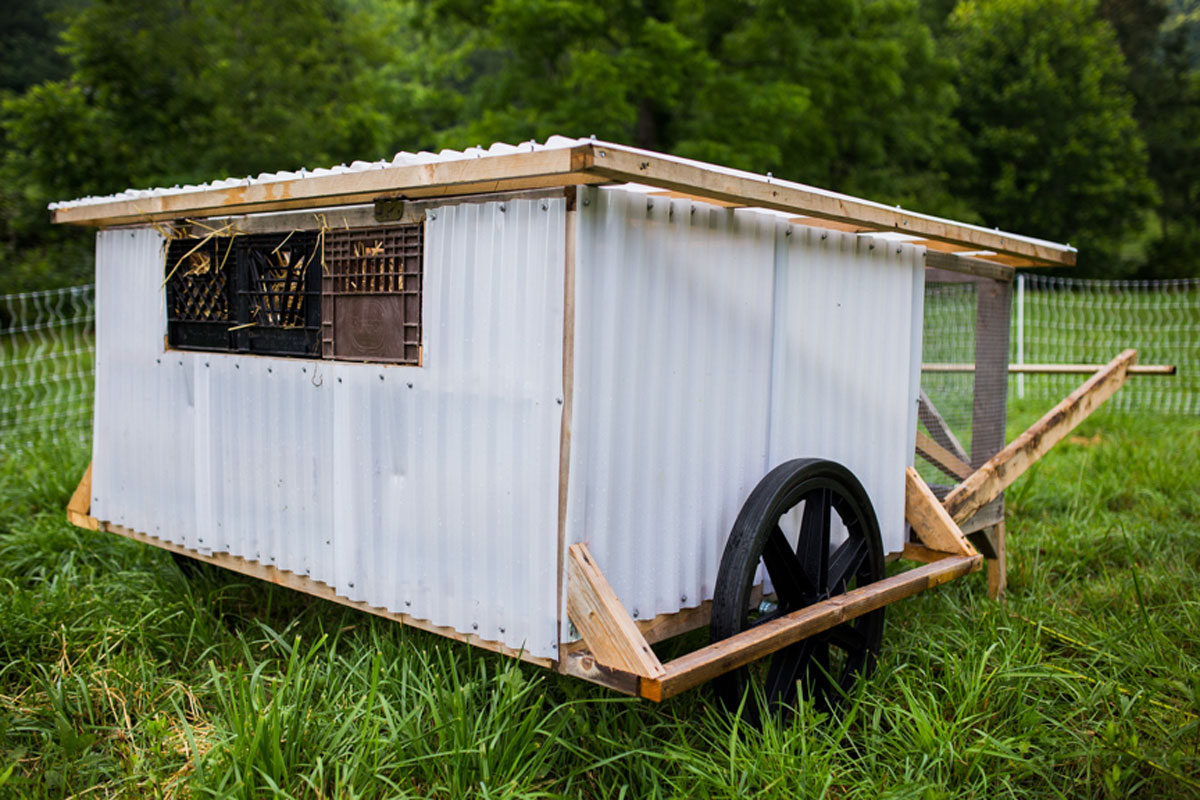
Accommodating a range of flock sizes, it’s now possible to move a lot of birds regularly with an electric poultry net and my famous ChickShaw. Before now, mobile chicken housing was limited to tiny house chicken tractors and mobile-home sized coops.
My DIY ChickShaw plan provides shelter for chickens all year long, and it’s so lightweight that it takes only one person to move it all over your homestead. I’ve built in several additional design features that will make everyone’s life a bit easier.
How many Chickens Fit in a ChickShaw?
The ChickShaw 2.0 allows enough room for the chickens to move around, and if you look in at night, you’ll notice there is even some extra room as they all huddle together.
Included are detailed instructions below. However, free printable step-by-step plans are available when you sign up for my email list. These plans include a complete cost breakdown and pictures with each step.
For visual learners, you can watch the video of me building this chickshaw by simply sharing these plans with your friends on Facebook!
Additionally, you can access free printable plans for the smaller ChickShaw MiniMe that houses 24 birds or less.
How often do you Move a Mobile Chicken Coop?
If possible, it’s best if you move the coop every day, but moving it every two to three days is acceptable. The chickens need a fresh patch of grass and dirt to peck and scratch, and the area that’s been turned and worked will have time to recover.
ChickShaw Benefits
- Built in Perches – Perches are built into the floor to save height and weight making it easy to move while keeping costs low.
- Mesh Flooring – This DIY mobile coop cleans itself. The 1” floor mesh keeps the predators out, and the manures drop directly to the earth below automatically. It makes an automatic fertilizer, and you don’t have to do any shoveling.
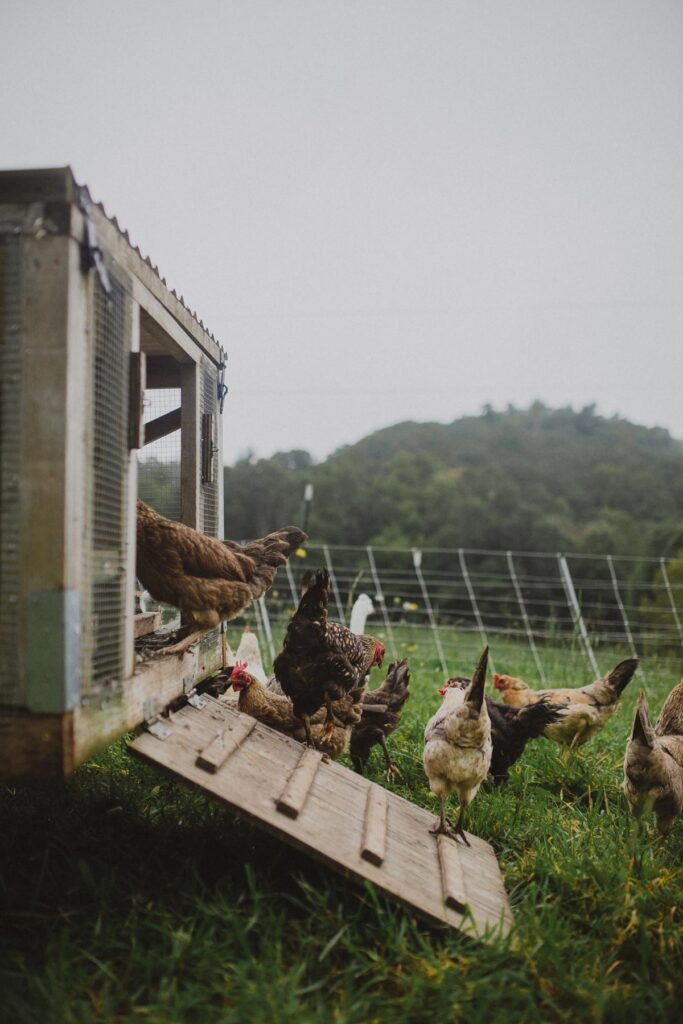
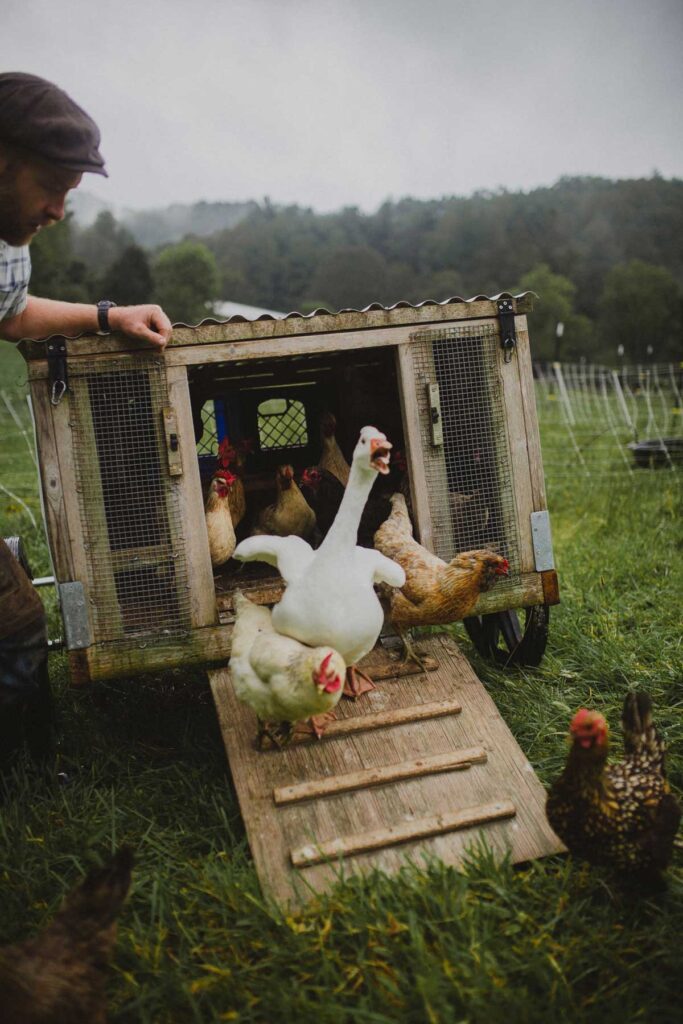
- Dual-Purpose Door – The door is also the ramp, making it super easy to shut them in at night and let them out in the morning.
- Hinged Roof – The roof is on hinges for those times you need to access chickens, or place something inside like a dust box.
- Handle – The handle for pulling the ChickShaw is easily removed for easy access and can be used to prop up the roof lid.
- Wheels – Large, non-pneumatic wheels can’t go flat, and will traverse crazy terrain. Plus, they’re tall enough so that the chickens can get under the house for shade and aerial predator protection during the day.
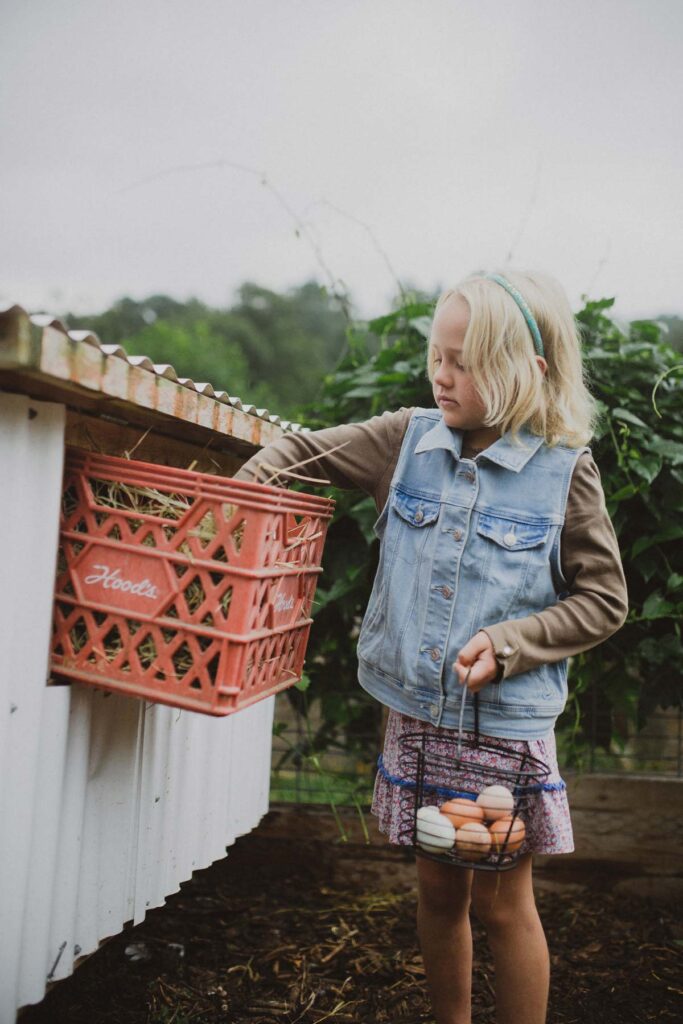
- Nesting Boxes – It uses my self-cleaning, “pre-made” milk crate nesting box design that you can access individually from the outside. No more going into the coop for eggs, and if you forget your egg basket or need to transfer a broody hen, just use the milk crate!
Supplies Needed
Note: These are the tools and materials I actually use and truly suggest. You may like to know that some of the links are affiliate links, which means I’ll get a commission if you purchase.
Required Tools
- Impact Drill – You could use a drill driver for this if you don’t have an impact drill, but having an impact drill and a drill driver can make life a hair easier.
- Drill Driver – For drilling pilot holes and making the hole for your handle.
- Hammer – For hammering the u-nails unto the wire mesh.
- Bit Holder Extension – Used for reaching through the tires AND screwing the roofing screws.
- Table Saw – This is much easier than using a Circular Saw, but if that’s all you have, it is possible to use a circular saw.
- Titanium Drill Bit Set – If you already have a drill bit set, make sure you have a 5/16th titanium bit that can drill through the metal.
- 1-½” Spade Bit – For drilling through the wooden arms for the handlebar.
- HackSaw – For sawing your metal handle to size.
- Measuring Tape – Or maybe two (we have two for the helpers).
- Straight Line Chalk Reel – For marking straight lines across your roof paneling for a straight cut.
- Adjustable Wrench – For adjusting the ¾” nuts on the axle.
- Jab Saw – For cutting milk crates into nesting boxes.
- Protective Eyewear – Safety is important!
Building Materials
- 22, 2X4X8 Cedar – Cedar is non-toxic and weather resistant. If you’re on a tighter budget, then consider eco-friendly paint over pine 2X4s.
- 5, Roof Panels – For the roofing and sides.
- 1, 2X4 Piece of Plywood
- 2, Marathon FLAT FREE 26” Tires – These should have a ¾” bore for the wheels. 2, 2.75” Lock Pins – For holding the handle in place.
- 12, 1.5” Corner Braces – For frame support.
- 4, 6” Wood to Wood Angle – For frame support.
- 8, Galvanized Corner Braces – For corner support.
- 2, Safety Hasps – For keeping the roof closed.
- 2, Spring Links – For clasping the roof shut.
- 4, 3” Hinge – For hinging the door and the roof.
- 1, 10’ Roll of ½” Wire Mesh – For the sides (DO NOT use ½” mesh on the floor).
- 1, 25’ Roll of 1” Wire Mesh – For the floor of the coop.
- 2, ¾” X 24” Standard Threaded Rod – For the axles.
- 8, 2”X2” Flat Washers – For securing the wheels.
- 4, 3/4” Lock Washers – For securing the wheels.
- 10, ¾” Nuts – For securing the wheels.
- 8 (Two Packs of 5), ½” EMT Wtraps – For securing the axle for the wheels. 2, 3” Barrel Bolt for locking the door.
- 4, ¼” Washers for swivel bar.
- 1 Pound, #8 X 1 ⅝” Stainless Steel Deck Screws – For framing.
- 1 Box, #10 X 3” Stainless Steel Deck Screws – For framing. If those aren’t available, get these.
- 1 Pound, ¾” Staples – For securing the wire mesh.
- 100 Count, Teks #9 X 1 ½” Roofing Screws – For securing the roofing panels.
- 1, 1.31” X 10.5’ Galvanized Steel Chain-Link Fence Top Rail – Serves as your handle.
- 3, 4” Gate and Eye Hook – For securing the swivel bar into a nest blocker and the kickstand.
- 1, 3.5 Quart Mineral Feeder – For Kelp and Aragonite free choice minerals.
- 4, 13” Milk Crates – For the self cleaning nesting boxes.
- 1, 4” Strap Hinge – For your kickstand.
- 1, #8 Washers – For shimming the barrel lock (you’ll need only 6 from the pack).
- 1, 18 Gallon Rubbermaid Tote – To serve as your dustbox.
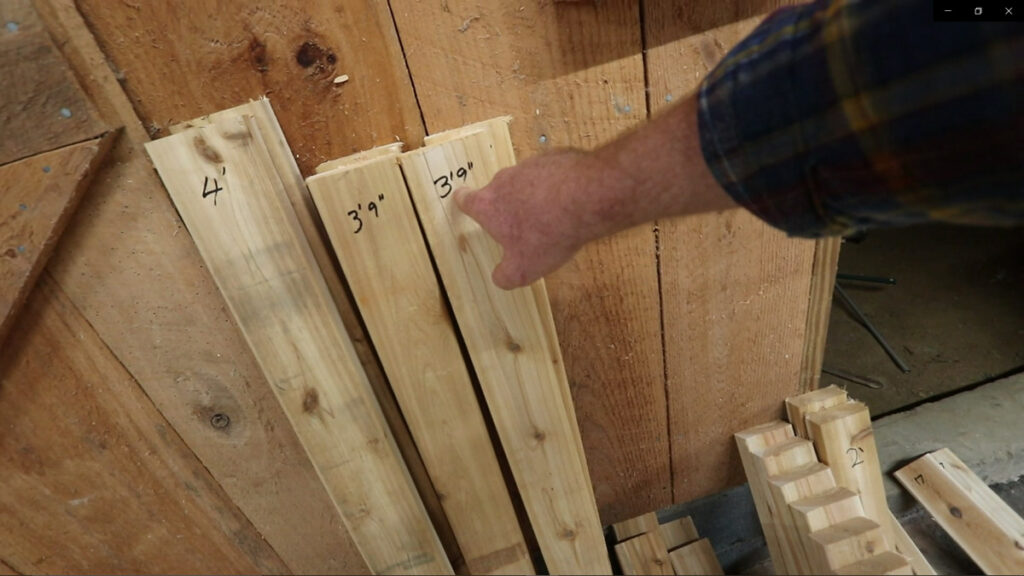
Cut List
- 2x4x8s (QTY 11)
- Cut two 2x4x6 and set your scraps to the side
- Cut four 2x4x5’9” and set your scraps to the side
- Take two 2x4x2’3” from the scrap pile and cut them into 2x4x181⁄4” (QTY 2) and then cut 45 degree angles on both sides. Make sure you cut your angle across the narrow sides of the board
- Get two 2x4x2’3” from the scrap pile and cut them into 2x4x16 1⁄4” (QTY 2) and then cut 45 degree angles on both sides
- Get three 2x4x8 and cut into 2x4x2’ (QTY 10)
- Get two 2x4x24” from the scrap pile and cut into 2x4x17” (QTY 2)
- Get two 2x4x32” from the scrap pile and cut into 2x4x231⁄2” (QTY 2), and then cut 45 degree angles on both sides
- Cut two 2x4x5’4” and set your scraps to the side
- Create your 2x2x8 from 2x4x8s (QTY 11)
- Strip the 2x4s and create 2x2s. Technically, a 2×4 is a 11⁄2”x31⁄2” so you’ll need to set your rip saw to 13⁄4” to split it in half.
- Strip twelve 2x4x8s into 22 – 2x2x8 (QTY 22)
Custom Cuts
- Cut nine 2x2x6
- Cut seven 2x2x5’9”
- Cut one 2x2x5’2”
- Cut two 2x2x32 3⁄4”
- Cut two 2x2x18 1⁄4”
- Cut one – 2x2x52 1⁄4”
- Cut two 2x2x6’4”
- Get four 2x2x2 from scrap pile and cut into 2x2x221⁄4”
- Get one 2x2x2 from scrap pile and cut into 2 2x2x11”
- Get one 2x2x2 from scrap pile and cut into 2 2x2x111⁄4”
- Take one 2x2x43 3⁄4” from scrap pile and cut into 2 2x2x171⁄2” with 45 degree angles
- Get two 2x2x2 from scrap pile and cut into 2 2x2x17 3⁄8”
- Get one 2x2x2 from scrap pile and cut into 2x2x13 1⁄2”
- Get one 2x2x2 from scrap pile and cut into 2 2x2x12”
Cut up Two 1x2x8s as Follows
- Cut two 1x2x4”
- Cut one 1x2x551⁄2”
- Cut two,1x2x71⁄2”
- Cut four 1x2x18”
Cut Wire Mesh
- Cut three 2’x6’ one-inch wire mesh strips
- Cut two 22”x26” of 1⁄2” wire mesh
- Cut two 20”x26 of 1⁄2” wire mesh
Cut 5 Roofing Panels
- Cut three 6’4” panels for the roofing and use your scraps in the next cut
- Cut three 16” panels from the scraps from your roof
- Cut four 26” panels
- Cut two 10” wide x 281⁄2 tall” panels
Handle
- Cut the metal pipe into a 5’ length with your hacksaw
Plywood Cuts
- Cut into a 28” length board from your 2×4’ piece of plywood to create your door
- Cut a 1”x24” strip and then cut two 6”x1” from that piece. Set the leftover piece to the side to be used as the dust box platform.
Wood Recap
- 2×4 – Longest to shortest
- 2x4x6 (QTY 2)
- 2x4x5’9” (QTY 4)
- 2x4x5’4” (QTY 2)
- 2x4x2’ (QTY 10)
- 2x4x231⁄2” (QTY 2) – 45° Miter cut (both sides) – trapezoidal
- 2x4x181⁄4” (QTY 2) – 45° Bevel cut (both sides) – trapezoidal
- 2x4x17” (QTY 2)
- 2x4x16 1⁄4” (QTY 2) – 45° Bevel cut (both sides) – trapezoidal
- 2×2 – Longest to shortest
- 2x2x6’4” (QTY 2)
- 2x2x6 (QTY 9)
- 2x2x5’9” (QTY 7)
- 2x2x5’2” (QTY 1)
- 2x2x52 1⁄4” (QTY 1)
- 2x2x32 3⁄4” (QTY 2)
- 2x2x221⁄4” (QTY 4)
- 2x2x18 1⁄4” (QTY 2)
- 2x2x171⁄2” (QTY 2) – 45° Miter cut (both sides) – trapezoidal
- 2x2x17 3⁄8” (QTY 2)
- 2x2x13 1⁄2”
- 2x2x12” (QTY 2)
- 2x2x111⁄4” (QTY 2)
- 2x2x11” (QTY 2)
- 1×2 – Longest to shortest
- 1x2x551⁄2” (QTY 1)
- 1x2x18” (QTY 4)
- 1x2x71⁄2” (QTY 2)
- 1x2x4” (QTY 2)
Pro-Tip: If you did all that in one setting, go take a break!
Step-by-Step Building Instructions
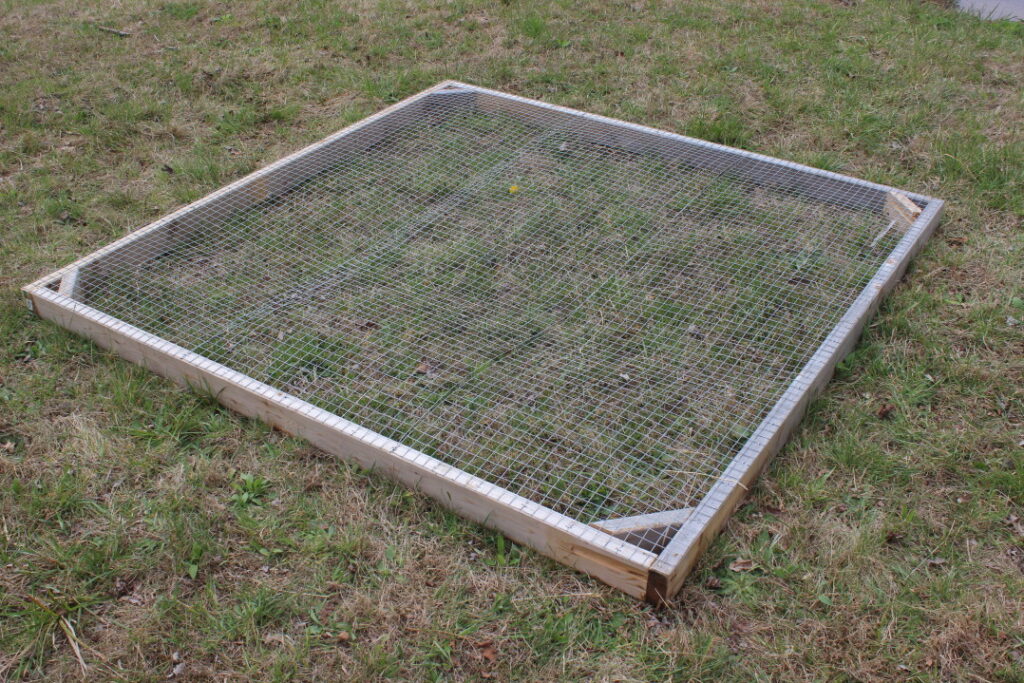
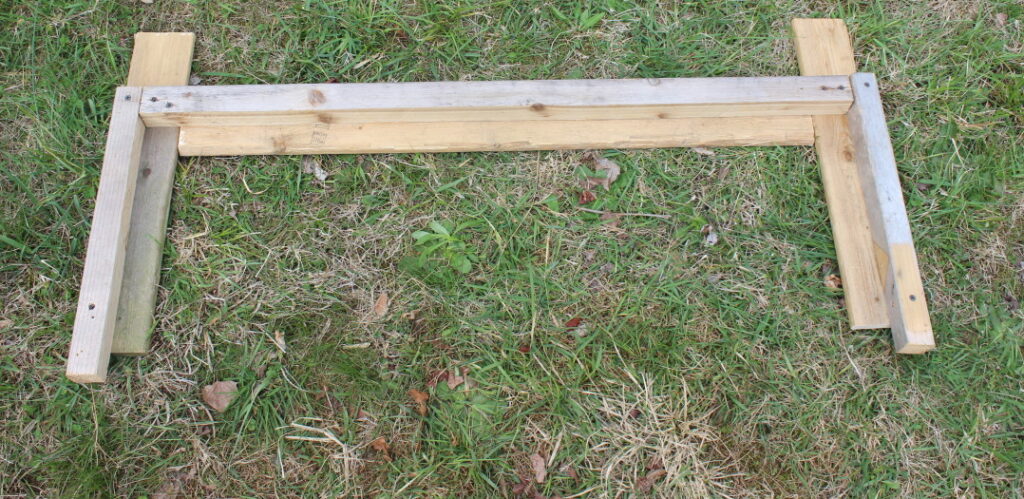
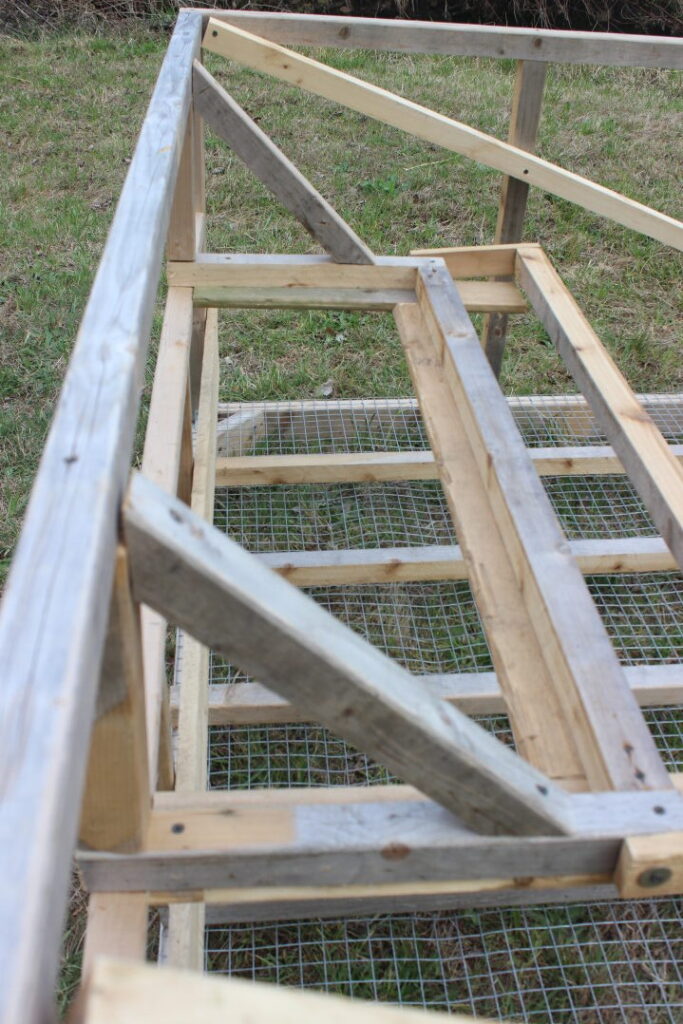
Step #1 – Bottom Frame
Lay down two 2x4x6s and two 2x4x5’9” to form a perfect 6’ square base. Attach with 3” screws. Be sure to place both your 2x4x5’9” pieces on the inside edge of your 2x4x6s.
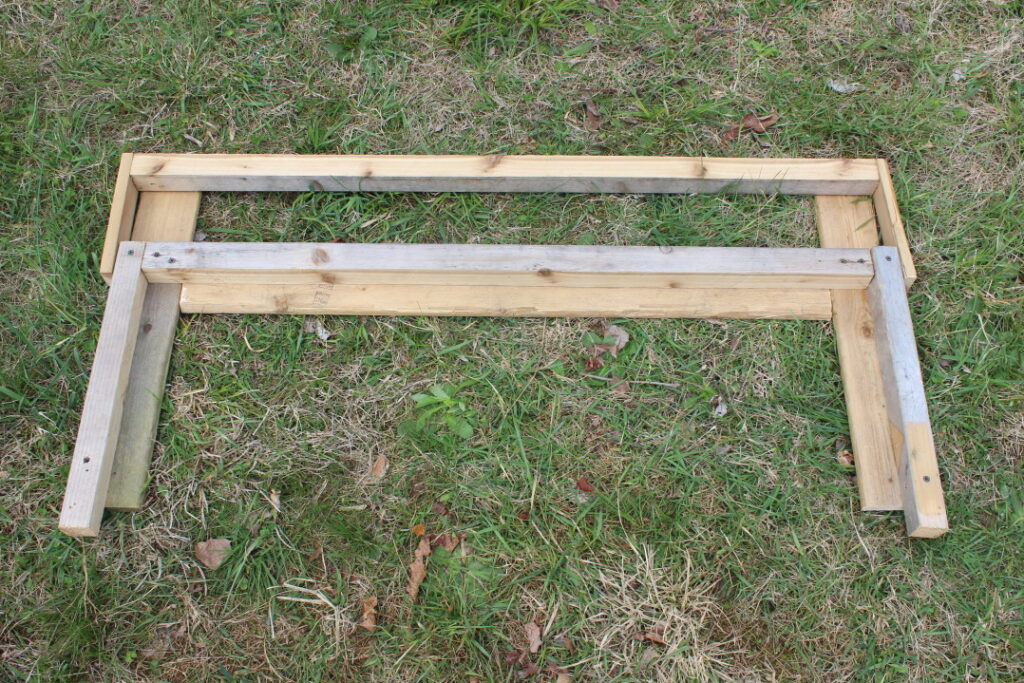
Step #2 – Axle Boards
Lay down two 2x4x5’9” inside the frame centered, 15” from the outsides of the frame. Attach with 3” screws.
Step #3 – Back Corner Braces
Lay down two 2x4X181⁄4” (with 45 degree angles) on the inside of the back frame. Attach to the frame with 3” screws.
Step #4 – Front Corner Braces
Lay down two 2x4X161⁄4” (with 45 degree angles) on the inside of your front frame. Attach to your frame with 3” screws. The front braces are shorter in order to accommodate the front legs later on in the plans. Don’t be concerned that these don’t stretch all the way to the axle boards.
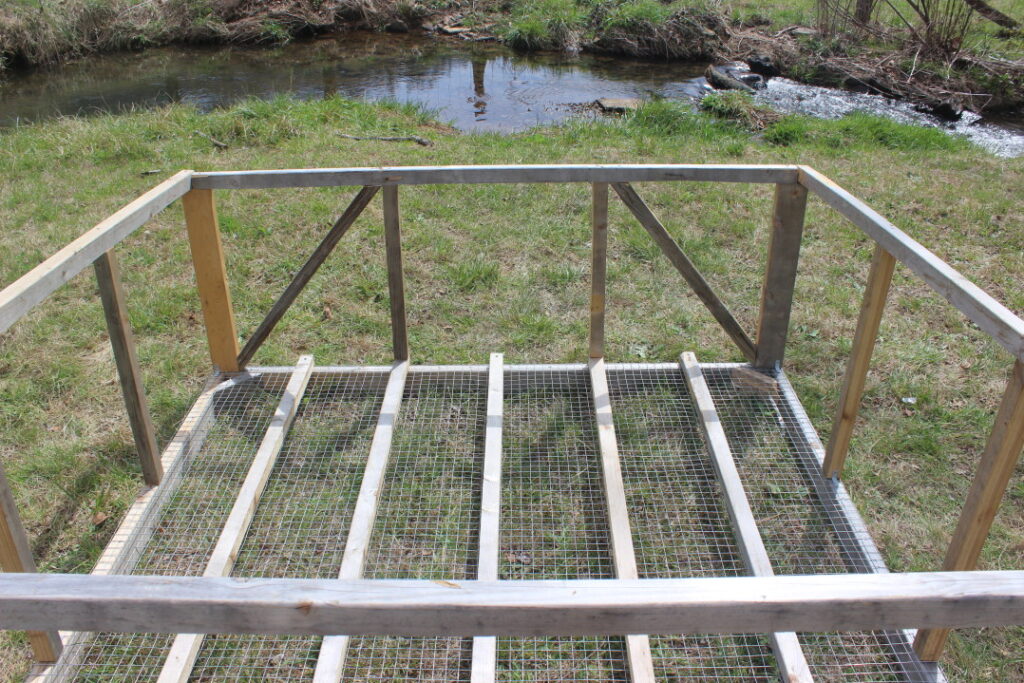
Step #5 – Floor Wire
Lay out three 6’x2’ one inch wire mesh across the frame and secure it with 3⁄4 staples. DO NOT lay it parallel with your axle frame boards. Instead, lay it perpendicular across your axle frame boards. It’s important to lay it crossways because you’re going to attach the edges of your wire to the perches (also running perpendicular to the axle frame boards) in the next step.
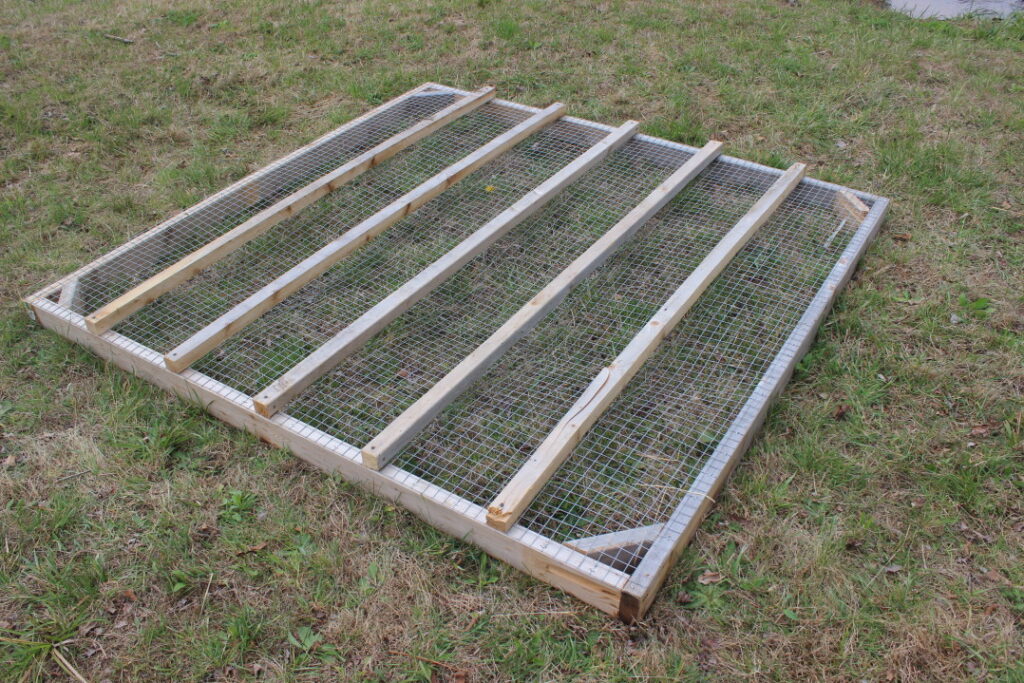
Step #6 – Perches
Lay out five 2x2x6’ centered every foot across the floor frame. Make sure the perches line up with the sides of the wire mesh so that you can attach the mesh to the perches in the next step.
Step #7 – Finish Floor Wire
Flip your frame over and attach the wire mesh edges to the perches.
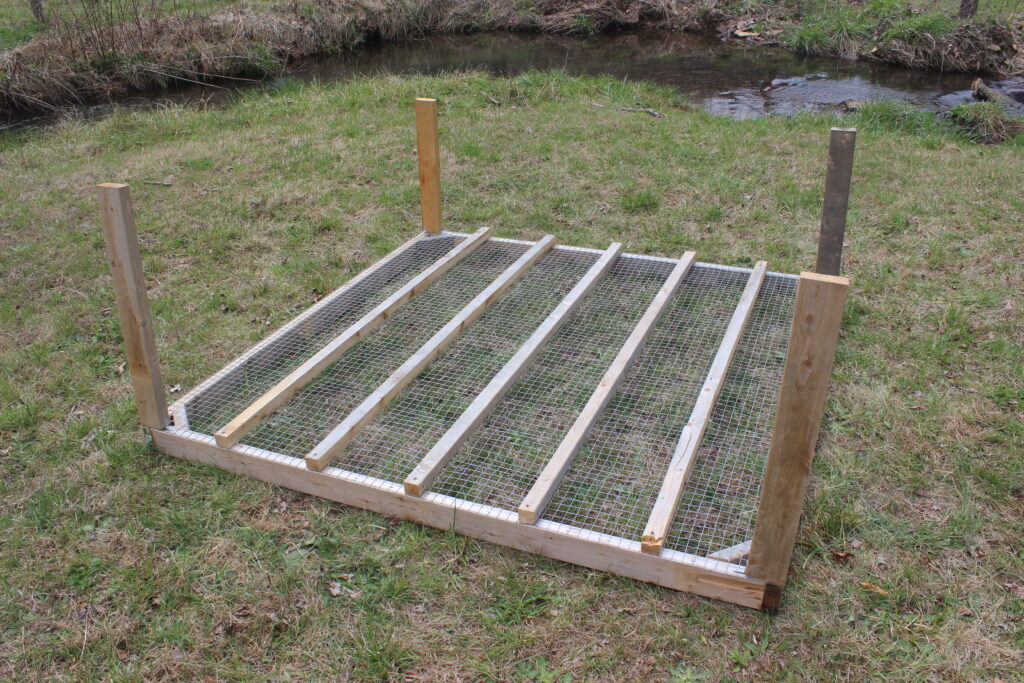
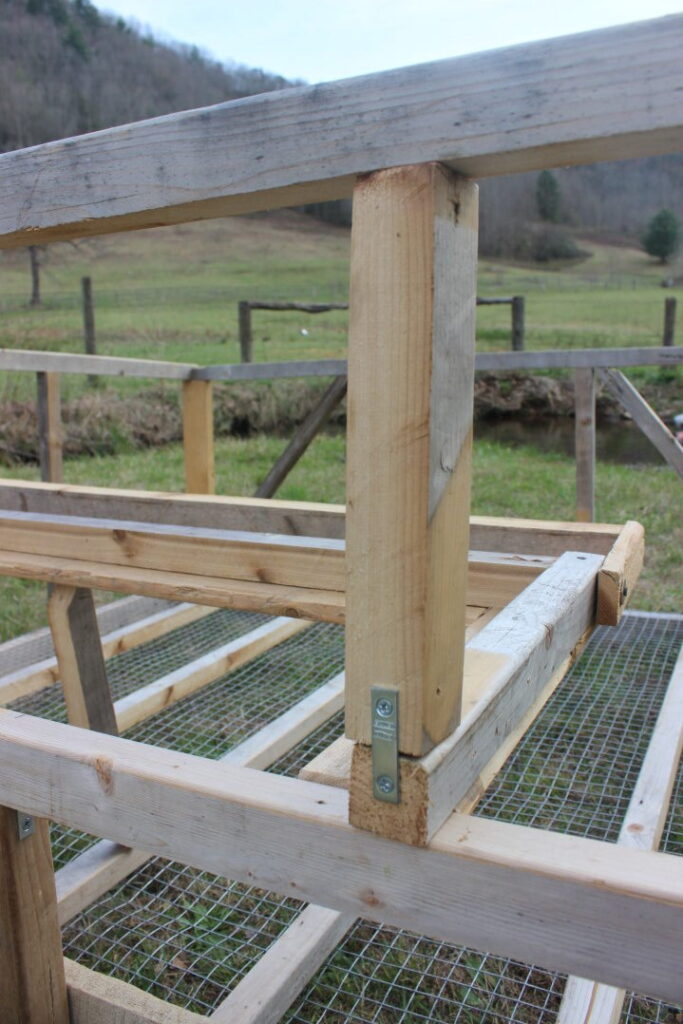
Step #8 – Building Corner Posts
Take two 2x4x2’ and attach them together with 3” screws. Make FOUR of these.
Step #9 – Attaching Corner Posts
Attach the corner posts to the frame by screwing in 15⁄8” screws into the galvanized corner braces on both sides of your posts. Make sure you place your 5” side of the posts towards the front. This is important for future measurements and adding strength to your top boards.

Step #10 – Wood to Wood Braces
Attach the wood to wood angles to each corner. Be sure to straddle where the corner posts meet the bottom frame.
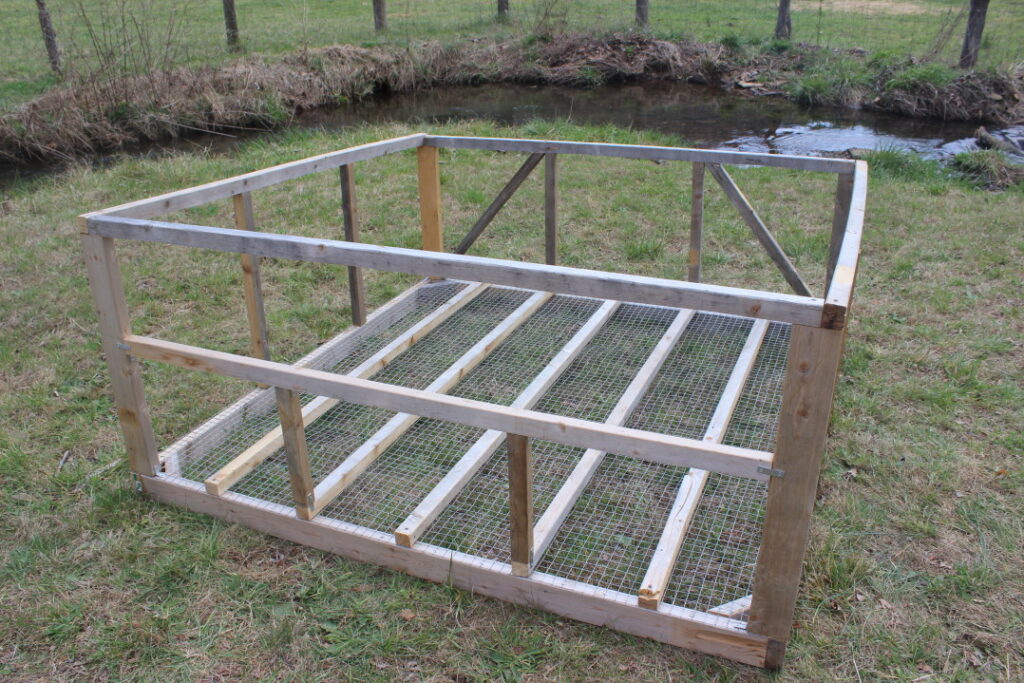
Step #11 – Front and Back of the Top Frame
Attach the two 2x2x6 across the front and the back of the ChickShaw and screw in 3” screws through the top of the frame to attach to your corner posts.
Step #12 Sides of the Top Frame
Attach your two, 2X2X5’9” to the top of your corner posts along both sides of your ChickShaw.

Step #13 – Side Posts
Add four 2x2X221⁄4” by placing these boards to the sides of your frame every two feet on top of the perches. Attach by screwing one 3” screw through the top of the frame down onto your Board and attaching the bottom of your board to the perch with a 1.5” corner brace.
Step #14 – Door Posts
Set two 2x4x2’ door posts centered 24” in from the outer edges. Make sure you measure from the top and the bottom, so your post sits perfectly vertical. Screw in two, 3” screws through the top of the frame to secure and attach the bottom of the 2×4 to the frame with your 1.5” corner braces using 15⁄8” screws.
Step #15 – Back Wall Frame
Attach the 2x2x5’2” using a 1.5” corner brace on each end (15⁄8” screws) to the back of the frame 11” up from the top of the bottom frame.
Step #16 – Vertical Back Wall Posts
Add two vertical back wall posts 2x2x11” centered 24” in on both sides to support the bottom of your back wall frame.
Step #17 – Side Angle Braces
Attach your two 2x2x6s to both sides inside of the shaw using 3” screws. Make sure they are both “climbing up” towards the front of the ChickShaw so they don’t get in the way of bracing the front wall of the ChickShaw in the next step.
Step #18 – Front Angle Braces
Attach your two 2x2X323⁄4” diagonally on the inside of both sides of the front walls of your coop.
Step #19 – Nesting Frame
Attach two 2x2X181⁄4” boards to your 2x2X521⁄4” board at the edge of the 14” mark from the bottom.
Step #20 – Swivel Resting Bar
Attach 1x2x4” board on both sides, underneath your nesting frame at the top edge allowing it to stick out 3⁄4“ of an inch.
Step #21 – Landing Bar Assembly
Attach your 1x2X551⁄2” board to your two 1x2X71⁄2” to form your swivel bar.
Step #22 – Create a Pivot Hole
Drill a 3/16” hole through the bottom arms of landing bar assembly. This will serve as a pivoting point to allow the landing bar to swivel up and down.
Step #23 – Attach Landing Bar to Nesting Frame
Screw a 3” screw with a 1⁄4” washer on either side of your arm.
Step #24 – Vertical Supports
Center two 2x2X111⁄4” vertical supports 91⁄4” in from the two outer edges. Make sure you face your corner brace towards the side of the ChickShaw (not the center). If you place your corner brace towards the center, it will interfere with the nesting boxes ability to slide in and out.
Secure with 3” screws through the top and bottom rails.
Step #25 – Diagonal Support
Attach two 2x2X171⁄2” diagonal support boards to line up with your vertical support. Yes, they’ll be hanging in mid-air, but we’ll connect them soon.
Step #26 – Attach Nesting Frame to the ChickShaw
Temporarily support the front of the frame with something of appropriate size while you attach the nesting frame. Line up your nesting frame with the vertical support posts.
Step #27 – Swivel Hooks
Mount the 4” gate lock to either side of the nesting box frame. Start with holding up both the hook and eye to figure out where you should place it. Try to keep the assembly horizontal. Drill pilot holes for both the hook and the eye and screw in.
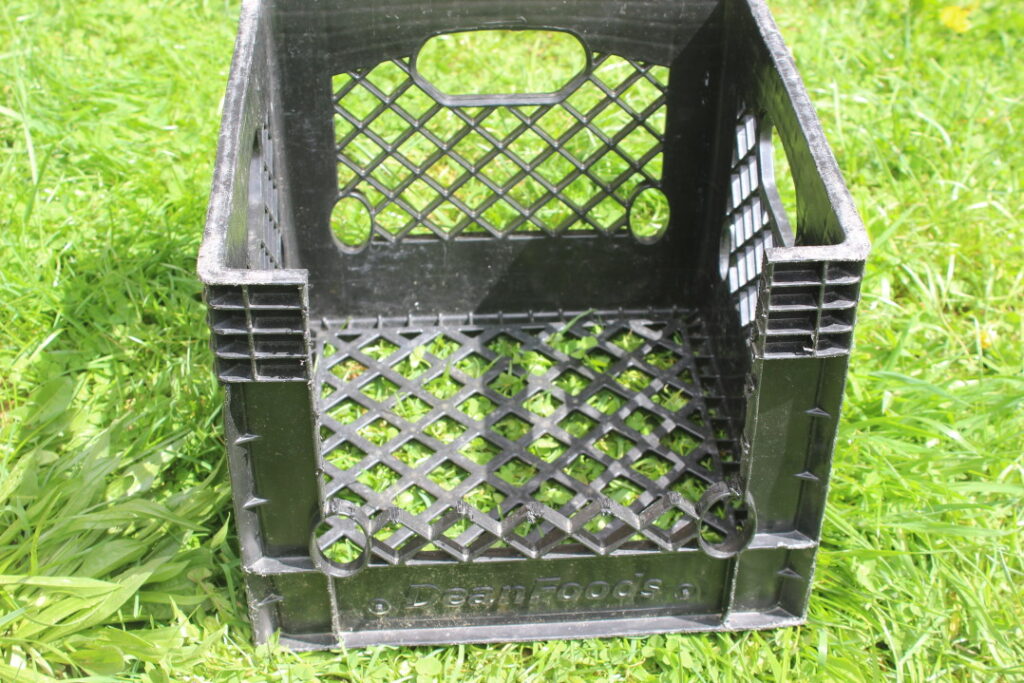
Step #28 – Nesting Box Openings
Cut your nesting box opening out of your milk crates.
Step #29 – Mineral Feeder
Attach the 2x2X173⁄8” to one side of the front wall, 6” up. Use 1.5” corner braces to support or toe nail a 3” screw. Attach your mineral feeder with two, 15⁄8” screws.
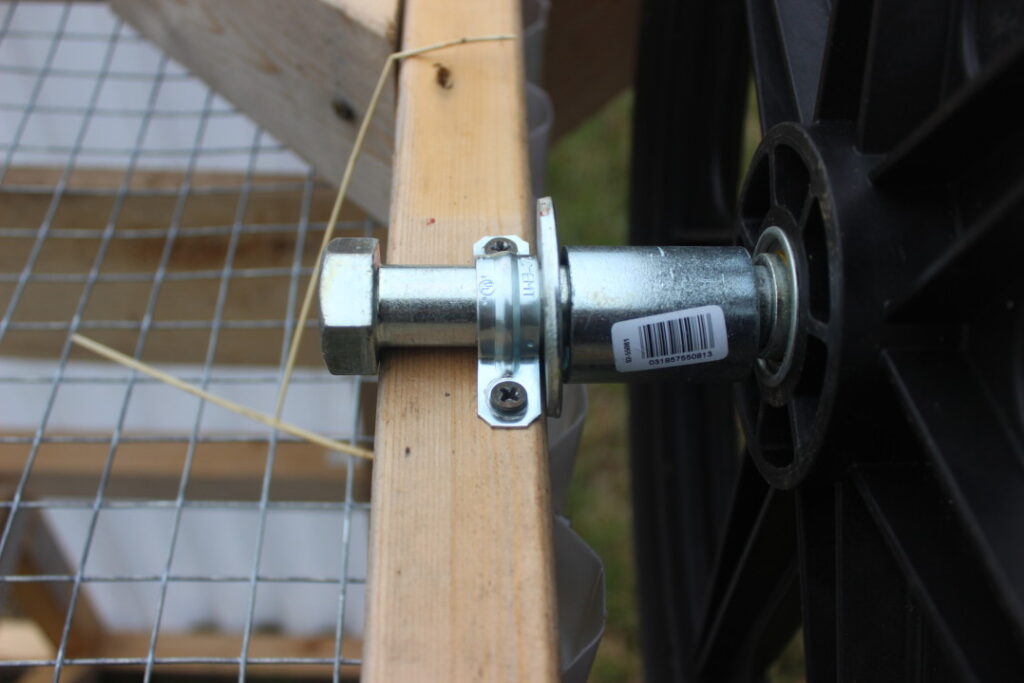
Step #30 – Wheels
- Assemble Wheels – Assemble your assembly about 6” in: Flat washer, nut, nut, flat washer, wheel, flat washer, nut, lock washer, nut. Adjust this assembly to the end of your axle.
- Assemble Axle End – Continuing on to the other end of the axle about 4” flat washer, lock washer and nut. Adjust the assembly to the end of your axle.
- Attach Axle and Wheel – Place the wheel in the center (3’) and attach to the frame with four, 1⁄2” EMT straps. Repeat for the other wheel.
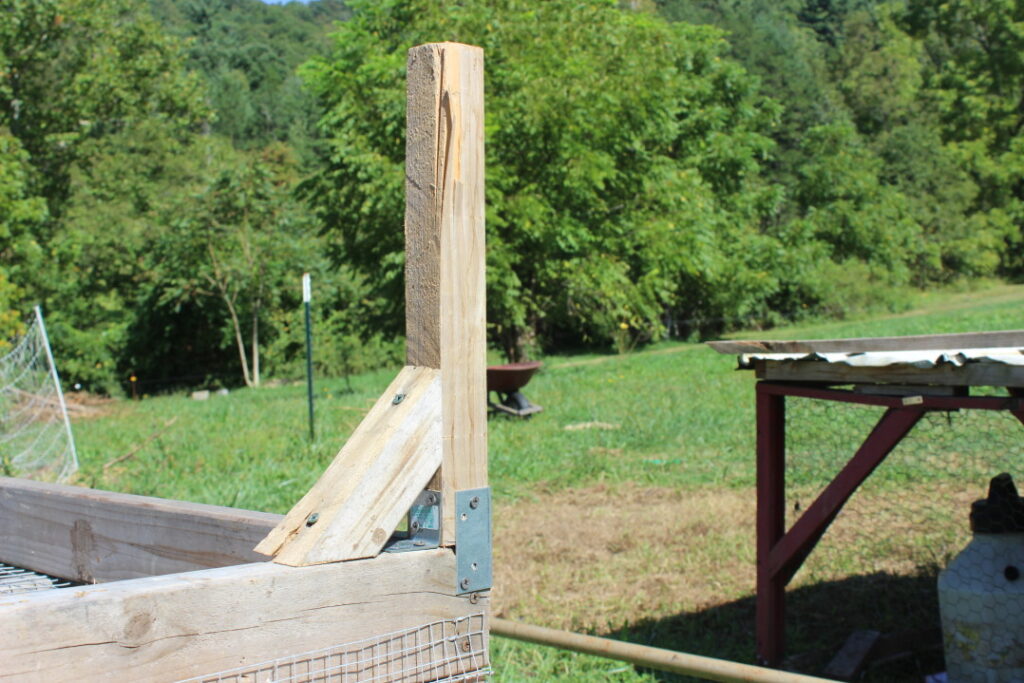
Step #31 – Posts
- Attach Front Posts – Attach two 2x4x17” to the outer side of the axle board of the bottom frame, two feet in.
- Post Supports – Attach two 2x4x23 1⁄2” diagonal support brace to the front post and ChickShaw frame.
Step #32 – Kickstand
Attach the strap hinge to one end of your 2x2X131⁄2” with your 1 5⁄8” screws. Then, attach your kickstand to the bottom of the back frame in the middle.
Step #33 – Door Hinges
Add two hinges to a long end of your 28”x 23 3⁄4” piece of plywood to serve as your door 4” in from the outer edge.
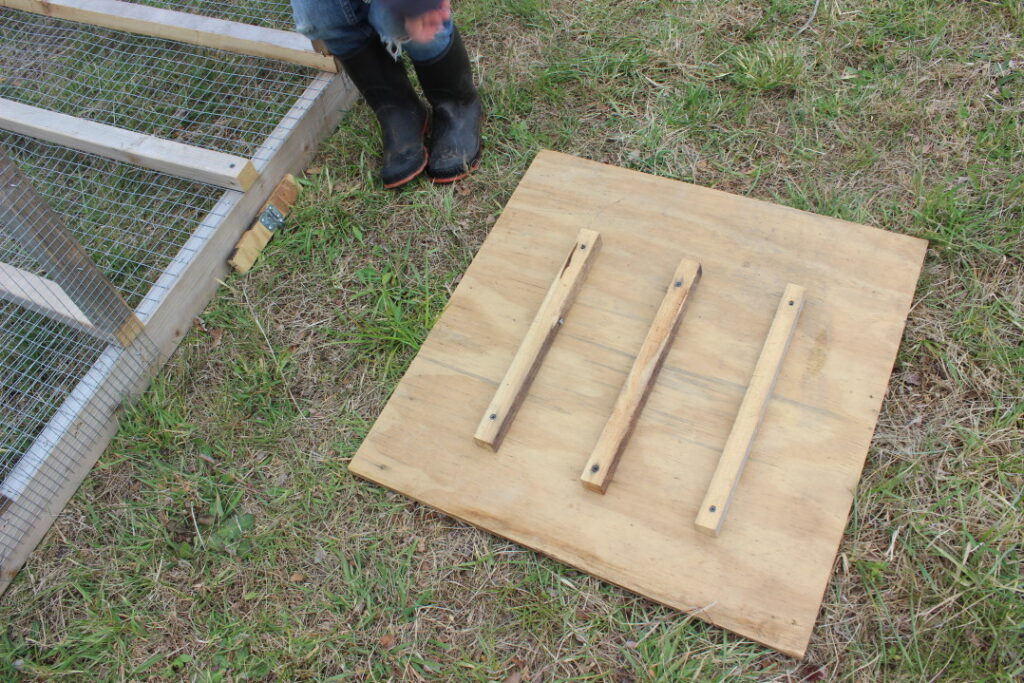
Step #34 – Cleats
Add four 1x2x18” boards to serve as cleats every 6” inches.
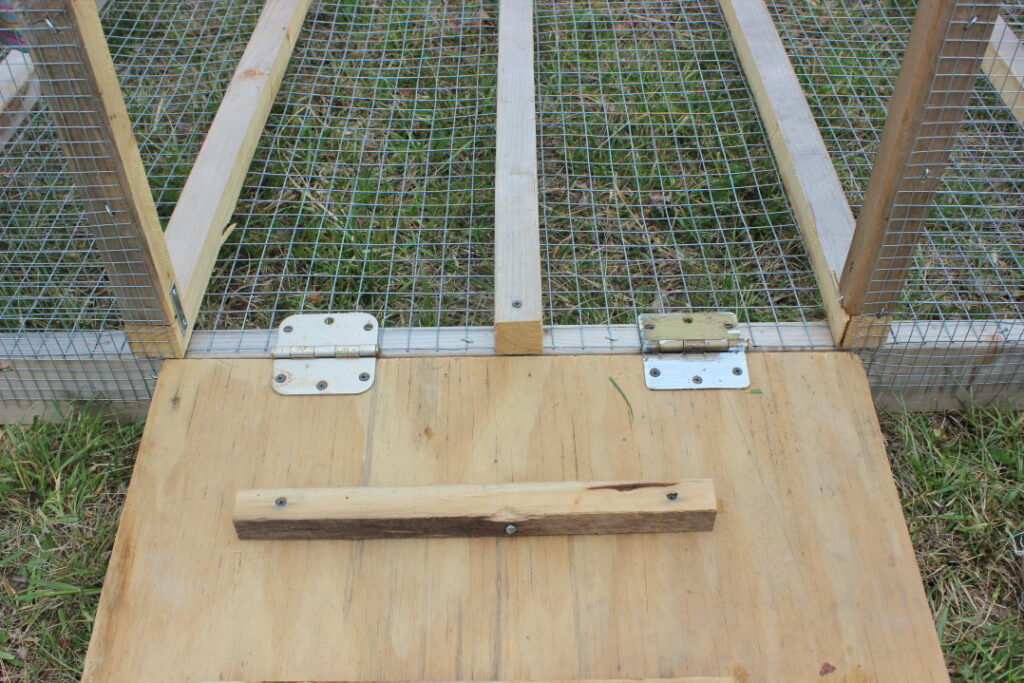
Step #35 – Attaching the Door
Attach the 28”X233⁄4” door to the front of the ChickShaw, on center, to the bottom of the frame.
Step #36 – Dust Box Platform
Take the 181⁄2” x 24” piece of plywood and lay sideways in one of the front corners and secure
to perches with 15⁄8” screws.
Step #37 – Lock Shims
Attach two 6”x1” pieces of plywood right next to the door on either side 33⁄4” down. Attach
with you 1 5⁄8” screws. Pilot holes highly suggested.
Step #38 – Barrel Locks
Attach the barrel locks on either side of the door. The door will not sit evenly with the shims because of the hinges. To compensate, add three #8 washers under the bolt straps to serve as shims.
Step #39 – Wire Mesh
- Front Side Wire Mesh – Attach two 22” x 26” wire mesh on the front sides of the shaw with your 3⁄4” staples.
- Front Wire Mesh – Attach the two 20” X 26” wire mesh on the very front of the ChickShaw, on both sides with 3⁄4” staples.
Step #40 – Panels
- Side Panels – Attach the four 26” panels to the side of the ChickShaw. Make sure you screw into the “valleys” of the paneling.
- Short Back Paneling – Attach the three 16” back bottom panels to the back of your Chickshaw.
- Tall Back Paneling – Attach two 10”X281⁄2” back panels on either side of the back wall.
Step #41 – Kickstand Hook and Eye
Mount the eye screw to the end of the kickstand. Now, screw in the 4” hook directly vertical
to fit. Be sure to drill pilot holes for your screws.
Step #42 – Handle
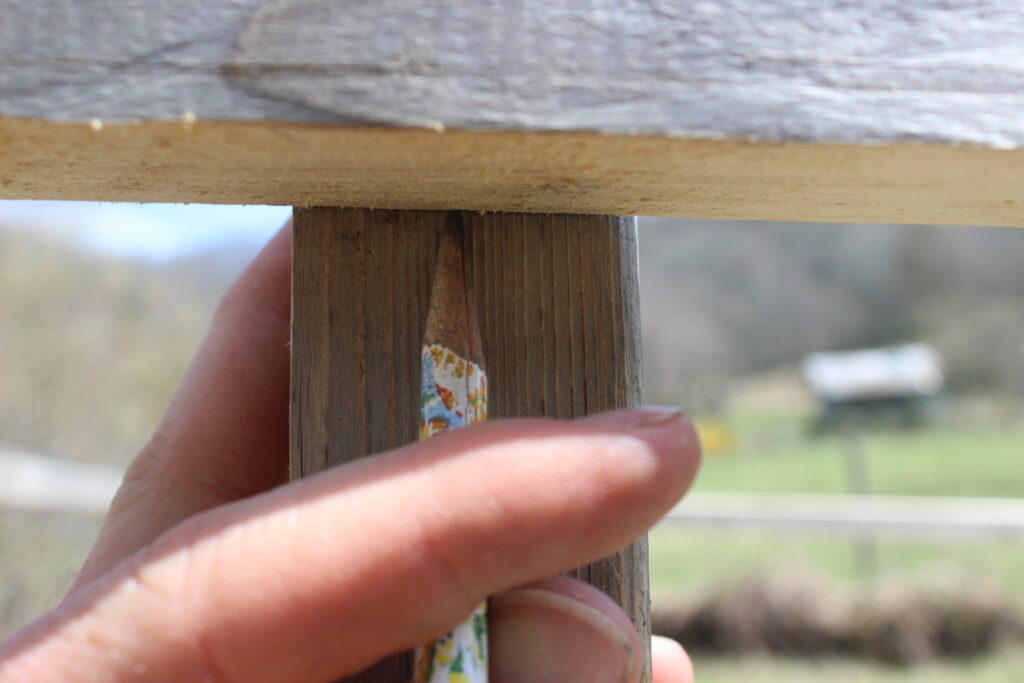
- Handles – Take one of the 2x4x5’4” and hold diagonally under the front of your ChickShaw, two feet in from the side. You want the end of the handle to be just above your knee. This is a hard step to explain and do, but looking at the picture and trying a few different positions will help. Now, mark where you handle crosses your 2×4 front legs. Take the other unmarked 2x4x5’4” and place it next to your marked board while still in place and mark your unmarked board where you need to cut.
- Handlebar – Cut the chain link top rail fence to 5’ to form your handle bar. It’s important to leave room on either end to hang stuff, and more importantly, use your handle as a prop for the ChickShaw roof.
- Handle Pins – Place the handle bar in the handles and mark a spot just outside the handles on both sides. This is where you need to drill your 5/16” holes for your pins. Now, drill your holes.
- Handlebar Holes – Take the 1 1⁄2” paddle bit and drill a hole for the handlebar into the handles in the center of the 2×4 about 4-6” from the end of your handle bars. You want to leave some room at the end of the handles as optional areas to hang feeders/waterers or similar.
NOTE: You may drill multiple holes to accommodate varying size family members or friends who might also move the ChickShaw.
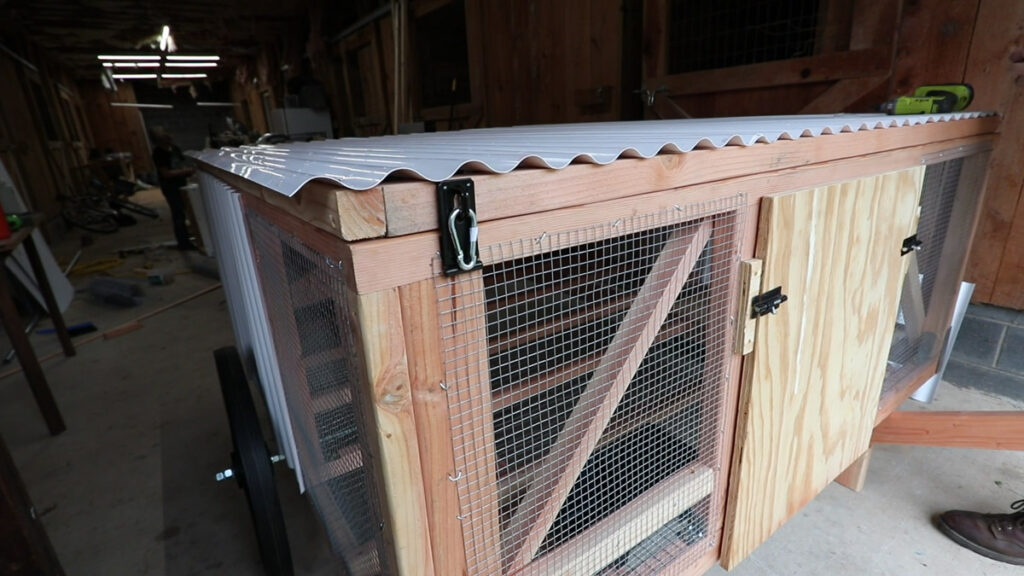
Step #43 – Roof
- Hinging Roof Board – Mount two hinges one foot in from either side to a 2x2x5’9” to form the hinging roof board.
- Attach Hinged Roof Board – Screw in the hinged roof board to the back of the frame with 1 5⁄8” screws.
- Roofing Frame Base – Build a 6’4”x6’ rectangle roofing frame by attaching two 2x2x6’4”s with two 2x2x5’9”. Attach using 3” screws. Now, attach two 2x2x5,9” centered at two feet and four feet from one end. Notice you’ll have a bigger gap between 2×2’s on one end. That needs to be the end you place towards the back of the ChickShaw where the pivot 2×2 board is.
- Attach Roofing Frame – Attach the roofing frame to the hinged roof board with two 3” screw in either side. Make sure to leave 4” overhanging on the back for extra rain protection for the nest boxes.
- Roof Corner Supports – Take two 2x2x12” boards cut at 45 degree angles and attach with 3” screws to the back of the roofing frame to offer the pivot board some extra support. Pilot holes are a huge plus for this step.
- Roofing – Lay out the roofing until it fits on the roofing frame squarely. You should have some hangover on the sides. Attach roofing screws about every two feet throughout.
- Roof Hasps – Screw in the safety hasps three inches in from either edge. Make sure you put the male end on the roof and the female on the lower frame. Secure shut with your carabiner.
Congratulations! You now have a mobile chicken coop, perfect for your egg-laying hens. Grab yourself a Premiere 1 net for protection during the day, and you’re now well on your way to having free-range egg-laying chickens for your family.
More Posts You May Enjoy
- Using the Permaculture Approach for Your Chicken Flock
- Mixing Your Own Chicken Feed
- Backyard Chickens – How to Get Started
- Basics of a Chicken Coop – Design Necessities
- Using Chickens for Garden Pest Control & Disease in Orchards
- Mineral Supplements for Animals
- What Killed My Chicken? – How to Know
- Why Do Chickens Stop Laying Eggs