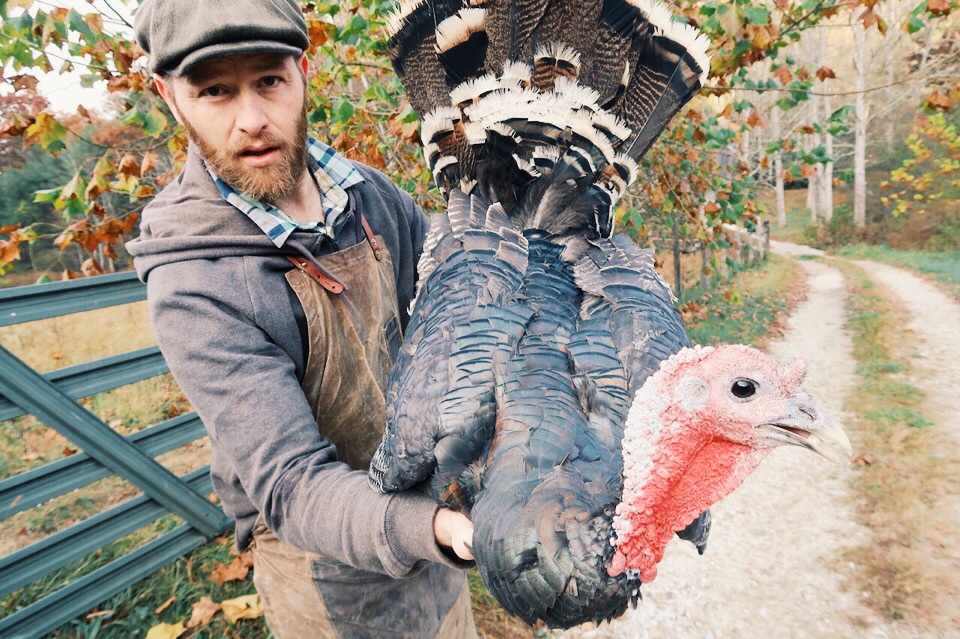
Five months into raising our heritage turkeys, we were ready for butchering day. We gave these turkeys their best life possible, fed them and protected them from predators. It’s definitely bittersweet.
I’ve documented this experience so that I can educate you how to raise and butcher turkeys humanely. If you’re just getting your turkeys, be sure to read up on how to raise baby turkeys (brooder stage), then how to raise turkeys (pasture stage).
Please note that there are images of the butchering process in this blog post. If you’re uncomfortable with seeing these images, then check out these other posts on the website.
Why You Should Butcher Your Own Turkey
The cost of purchasing a heritage pasture-raised turkey can be an expense most people can’t afford to include in their holiday meals.
Raising turkeys at home not only allowed us to enjoy this exceptional experience, but we were also able to sell excess turkeys to recoup our expenses and pay for the entire project!
Learning how to butcher your own turkeys plays into the overall expense of the bird and ensures that the process is done humanely.
Due to the graphic nature of this video, you’ll need to click the link and watch over on YouTube!
When Are Turkeys Ready for Butchering
If you’re raising heritage breed turkeys, you should butcher them between 24-28 weeks. If you are raising broad-breasted turkeys, then 16-20 weeks is a better age.
Where Is the Turkey Breast Meat?
The breast meat on a turkey is the only white meat on the bird. It is the meat taken from the chest of the turkey. Some people prefer to just take the breast meat on a turkey because it’s a large piece of meat that’s easy to access and store.
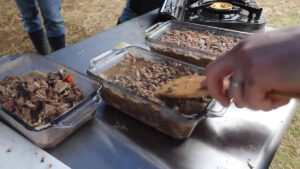
However, so much more of the bird is usable, including the liver, heart, gizzards, neck, and feet! After spending so much effort in raising your own turkeys, I encourage you to use the whole thing. And be sure to save the bones, neck, head and feet for making homemade bone broth.

Supplies Needed
It’s best to gather all your supplies ahead of time. Turkeys have very sharp talons, and you want this process to be as efficient as possible to avoid having to hold your bird and risk the possibility of getting scratched.
- Table – I would recommend using a table that’s easy to spray off.
- Killing Cone – We had the medium cone, but I would recommend the large one. If you don’t have access to a killing cone, you can cut one corner out of a feed bag and put your turkey’s head through the hole. The bag will keep you from being scratched during the process.
- Buckets – You will need a bucket or two to drain the blood.
- Trash Can – Have a large trash can for throwing away feathers, etc.
- Sharp Knife – For the most humane kill, use a good sharp knife like this one.
- Poultry Shears – Poultry shears are special clippers designed to cut through bird bones easily.
- Scalder – A scalder heats the bird making it easier to remove the feathers. We like this scalder. A turkey fryer filled with hot water can also be used in a pinch.
- Plucker – Having a good plucker makes this job so much easier. Trust me on this. Our plucker struggled with the larger bird, but we think it’s because there was a pause between it being in the scalder and going to the plucker.
- Ice Cooler – It’s important to cool your turkeys down quickly after processing, and you may not have refrigerator room to do this (especially if doing a large number of birds at a time). A large cooler filled with ice works well for quickly cooling your turkeys.
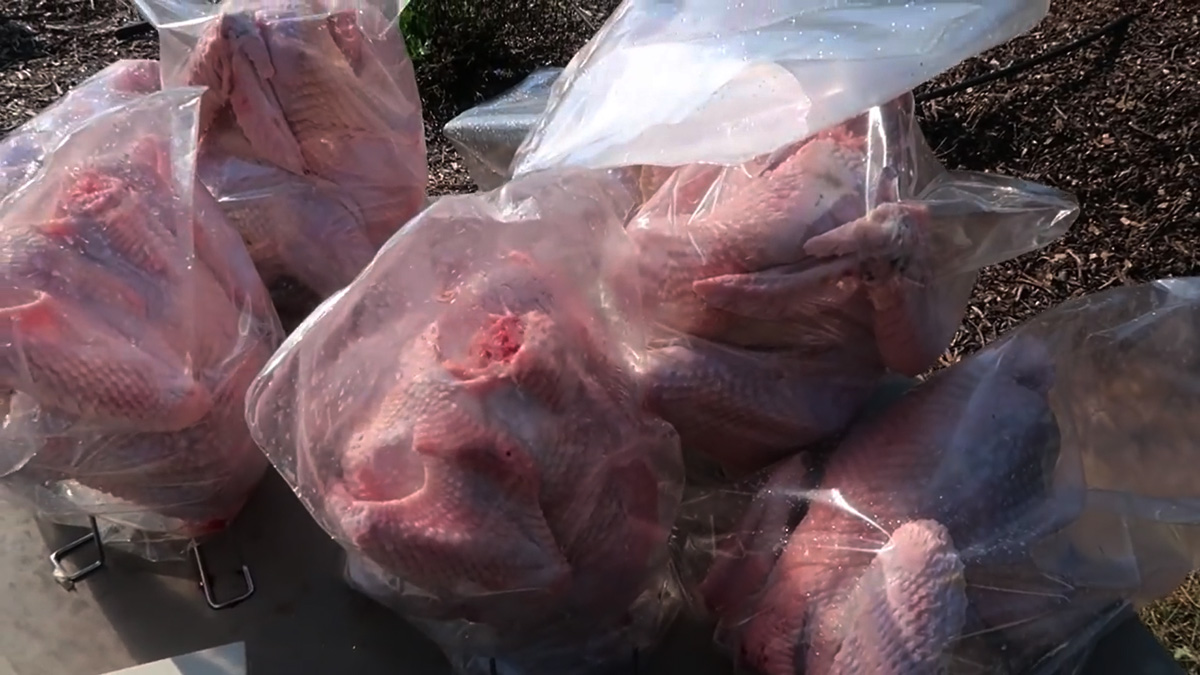
- Bags – Shrink bags or other plastic bags work well for freezing your turkeys. Pro-Tip: If your bags don’t shrink wrap easily, submerge the bag in water and let the air escape, then secure the bag while the air is out.
How To Butcher a Turkey Step by Step
Some farmers use the method of chopping off the turkey’s head when butchering. I prefer the method of slicing the neck and letting the bird bleed out. This method optimizes the flavor of your turkey’s meat.
- Gather all your supplies into one place. This will make the process go much smoother.
- Fill and heat the water in your turkey scalder. This can take quite a while to get up to temperature, so plan accordingly.
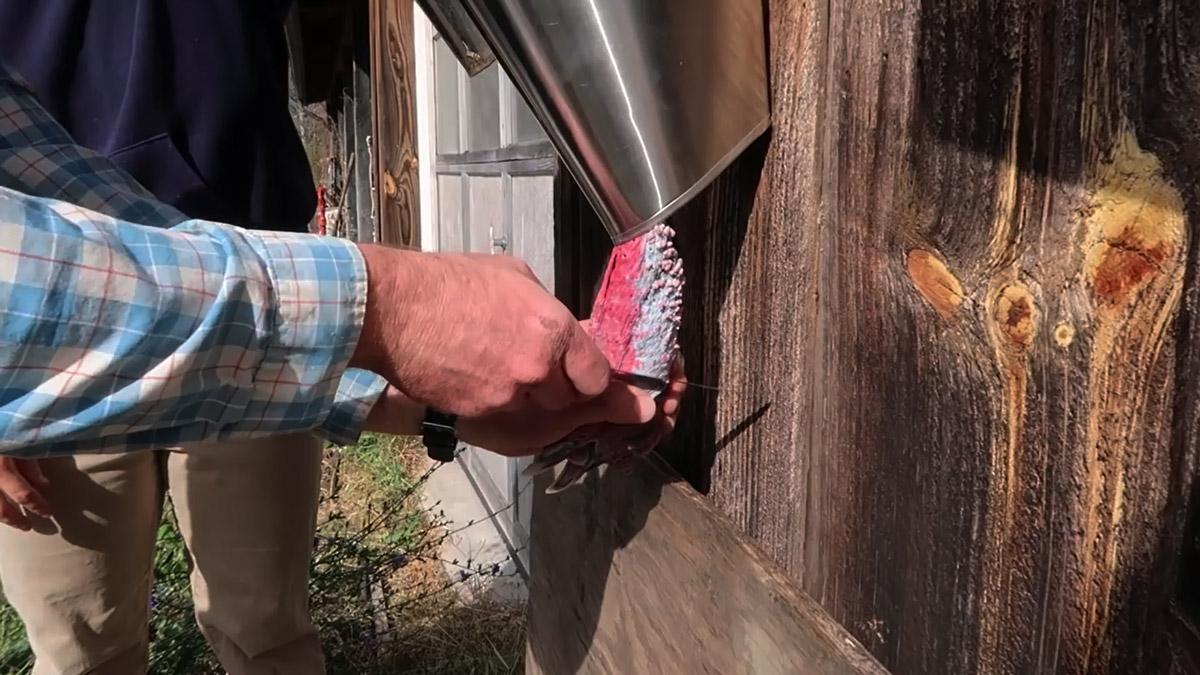
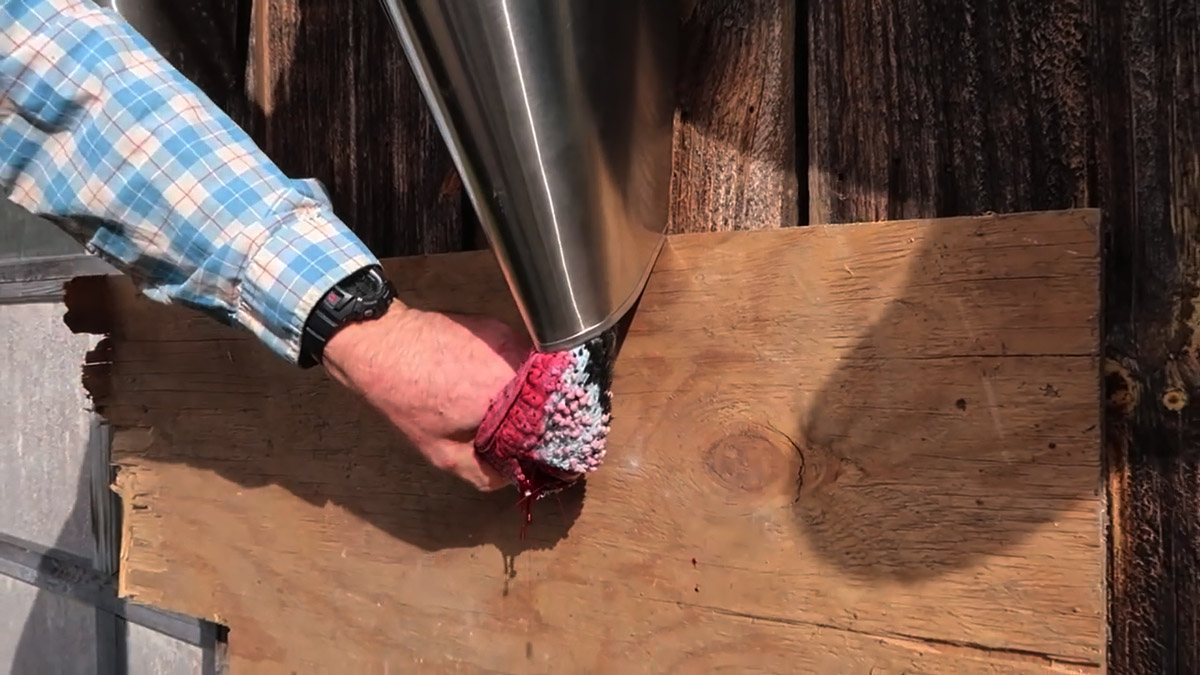
- Place the bird upside down in the killing cone. Placing them upside down sedates the bird and prevents them from flapping around.
- Cut the bird’s throat, letting the head hang downward until the bleeding stops. Butchering in this manner will improve the flavor of your meat. Pro-Tip: Always start with a very sharp knife. This will make your job easier and a sharp knife is a humane knife.
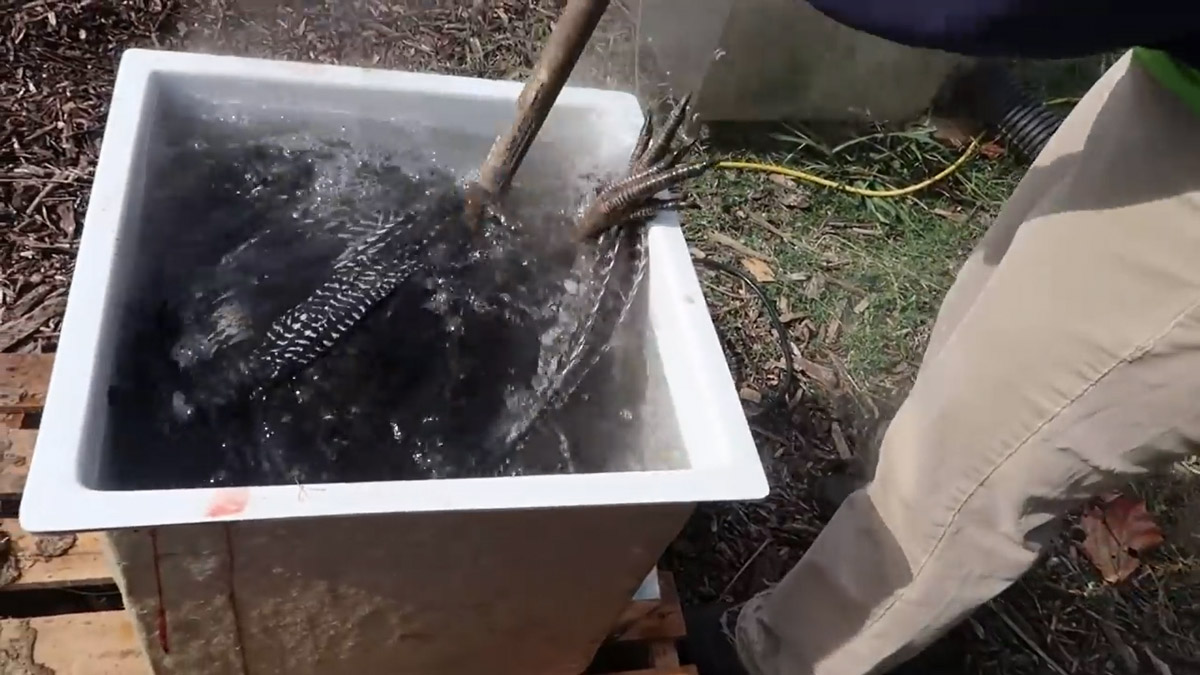
- Scald your turkey in the turkey scalder. Turkeys are scalded to help speed up the plucking process. It makes it so much easier to get the feathers out.
- To scald a turkey first heat the water in your scalder to between 145-155 degrees Fahrenheit. Let the turkey sit in the water for approximately a minute and move the turkey around a bit to make sure the scalding water gets in and around all the feathers.
- To test if your turkey is done in the scalder, try pulling out one of its tail feathers. If it comes out easily, you are ready to pluck your bird. Over-scalding your bird will make the skin tear easily, so keep an eye on the time. Also, scald the feet if you want to use the feet to make broth.
- Pop your turkey into a plucking machine. An automated plucking machine is a rotating drum that has rubber projections that remove the feathers from poultry. It works very quickly and efficiently to de-feather your turkey.
- Hand pluck the remaining feathers.
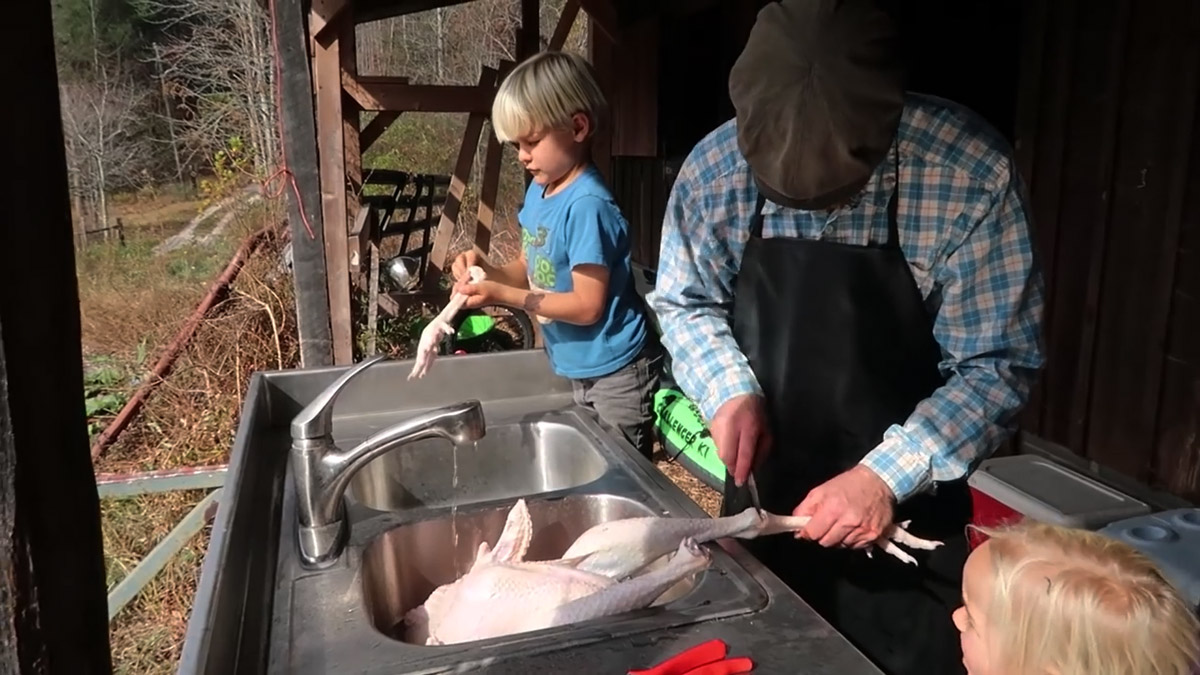
- Rinse well with fresh water to ensure that all dirt and feathers have been removed.
- Using poultry shears (or a very sharp knife), cut off the head and the legs.
- Remove the oil gland from the back end of the turkey. This oil gland will give your meat a bad taste if it bursts. (For more images on this process, you can check out this post on how to butcher a chicken.)
- Cut the skin off the neck to expose the esophagus.
- Using your fingers, separate the esophagus from the neck by tearing the connective tissue holding them together.
- Cut off the neck using your poultry shears. This also can be used for making broth. Leave the esophagus for later to be removed through the body cavity.
- To begin gut removal, place the turkey on its back with its legs toward you. Find the two tiny bones sticking up in the belly and make your cut horizontally.
- Using your hands, pull the cavity open to expose the entrails. Pro-Tip: Pull the cavity apart with it hanging over the edge of the table so that your bird isn’t exposed to any manure. If you do get manure on your bird, spray it down with a hose.
- Put your hand in the cavity and reach around the edges of the rib area to remove the membranes that hold the guts in there. Grab the guts and pull them out. Let them hang over the table and let gravity do the work.
- If you want to save the liver and the gizzard, now is the time to remove those.
- Remove the lungs separately by reaching up by the ribs and sweeping the lungs out with your fingers. If you don’t get all the lungs out, it doesn’t matter because you don’t eat that part of the bird anyway.
- Reach through the cavity and remove the crop and esophagus.
- Plunge your bird into ice-cold water and let it chill for several hours. It’s important to chill your meat as quickly as possible.
- Once your bird is cool, dry it and bag it in a shrink-wrap bag or other freezer-safe bag.
Congratulations, you now know how to butcher a turkey. It truly does feel good to know how your food was raised and know you’re feeding your family the best quality food.