Whether you make your own soil-blocking recipe or use a potting mix from the store, making soil blocks for seed starting is a welcome cost-saving task.
Why I Make Soil Blocks
Soil blocking was made popular in the United States by Eliot Coleman after writing his book The New Organic Grower and designing his soil-blocking tool. Soil blocking has proven to be the best method I have found for seed propagation.
Seed blocking is more sustainable than traditional seed starting methods, eliminating the need for plastic or the more expensive biodegradable seed pots. After the initial purchase of the seed-blocking tool, you can make endless soil blocks for your garden each year.

What Is Soil Blocking?
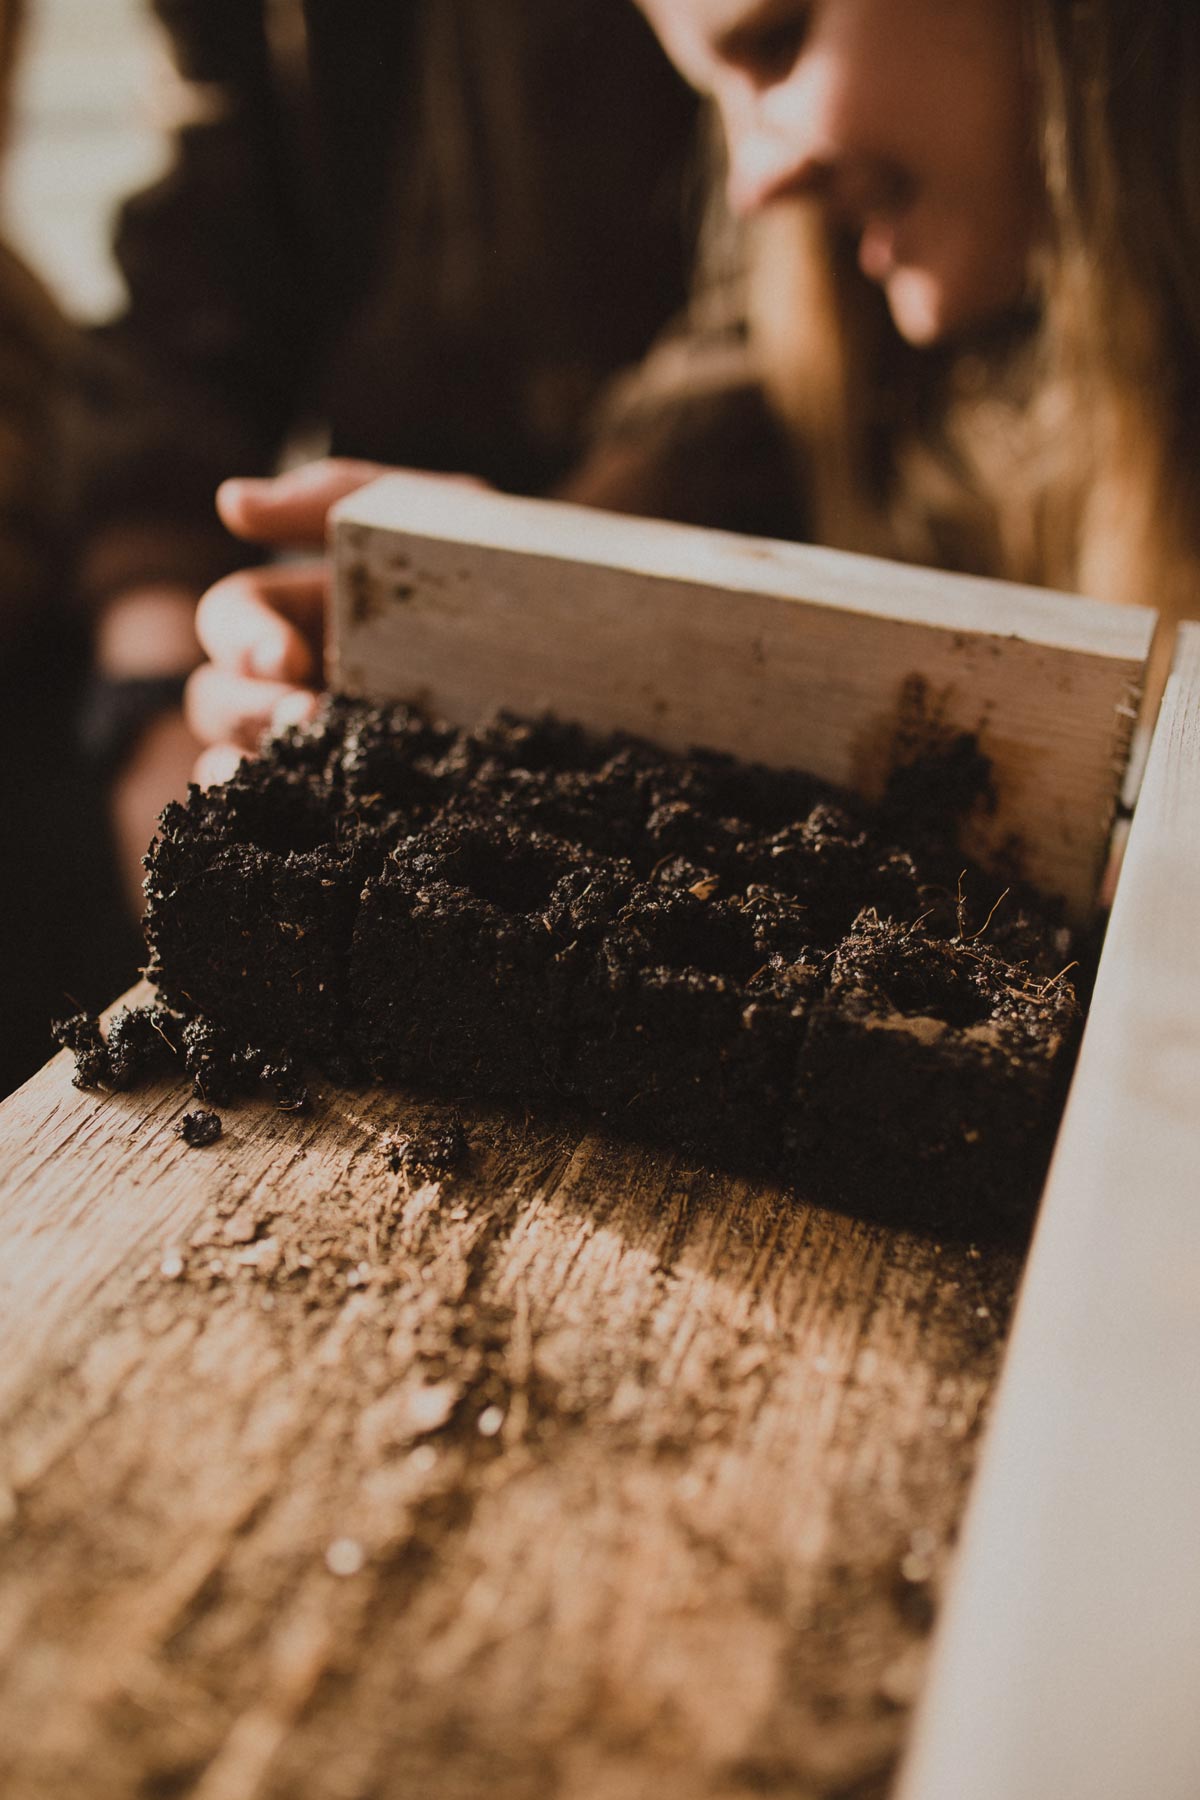
A garden soil block is simply potting soil compressed into a block to germinate seeds. The main benefit is less stress on the germinated seeds’ roots when transplanted. The roots of a seedling will stop growing when they reach the air.
When seeds start in traditional seed trays, the roots continue to grow and often become root bound. The seed blocking process allows for air pruning of the roots resulting in a healthier root system to avoid transplant shock.
Due to the density of the compacted potting soil, soil blocks tend to be heavier than potted seedlings. Instead of seed trays, our soil blocks are held together in DIY wooden soil block trays. Soil block trays are made with sturdy wood to support the soil and for strength while transporting.
Supplies Needed
- Scrap Wood – Go on a treasure hunt around your homestead and find some scrap wood.
- Measuring Tape – You kind of want the sides to be equal!
- Straight Edge Table – Use for cutting if you don’t have a table saw, making the tray assembly much easier on your back.
- Saw – A handheld saw works, but use a table saw if you have one.
- Clamps – Long-armed clamps are one of the best inventions ever made!
- Screws – I suggest 1 ⅝” decking screws, but you can use any size you know will be long enough to support the size tray you are building.
- Drill – A cordless drill works well.
- Potting Soil – Using a soil block recipe with peat moss to make a special soil-blocking mix is unnecessary. The soil you choose just needs to be able to retain moisture while also being loose enough to allow the roots to grow. Just keep in mind if you’re going to be starting your seeds indoors, only use bagged potting soil that hasn’t been opened to avoid flies hatching inside your home.
- Water – Water is needed to wet the potting soil. Your soil mixture will need more moisture than you typically use in seed starting trays.
- Large Container – It must be deep enough to mix the soil and water, press the soil-blocking tool into the dirt and move side to side.
- Soil Blocking Tool – If you are in the market for soil blockers, I recommend Ladbrooke soil blockers.
- Seeds – Seeds of your choice!
- Compost – Organic compost, preferably from your farm.
- Misting Bottle – A spray bottle for misting the soil. Seedlings need a constant supply of damp soil. They should never dry out. A misting bottle helps keep the soil damp while not harming the plant.
- Greenhouse or Plastic Cover – Most seeds need the greenhouse effect to germinate. Cover the seed block tray with a plastic cover if you don’t have a greenhouse.

Soil Blocking Step-by-Step
How to Build Soil Block Trays
There is no specific size requirement. Make it work for your needs and space. Still, for the purpose of these instructions, we are going to establish the size of 15″ x 20″, and we are using a sheet of ½” plywood as the available scrap wood.
- Cut the bottom piece first. Measure and cut it at 15″ x 20″.
- Cut a piece for the back side edge. Measure and cut it 3″ x 20″.
- Cut two pieces for the two end edges. Measure and cut two pieces 3″ x 15¾”. The ¾” is to accommodate for overlap to secure the back side edge. (No front edge is necessary)
- Use clamps and secure all sides firmly in position.
- Drill screws into each edge side for strength and sturdiness. Two per end side, one in the back edge center, and two at the top edge of both ends should work well.
How to Make Soil Blocks
- Pour potting soil into a container large enough for mixing and deeper than the depth of the soil block tool you are using.
- Water down the potting soil and ensure the soil mixes with the water enough for the soil to clump together.
- Press the soil block tool into the soil mixture and move it from side to side.
- Pull up and release it into the soil block tray. Pro-Tip: It might take a few practice attempts before you get the hang of it.

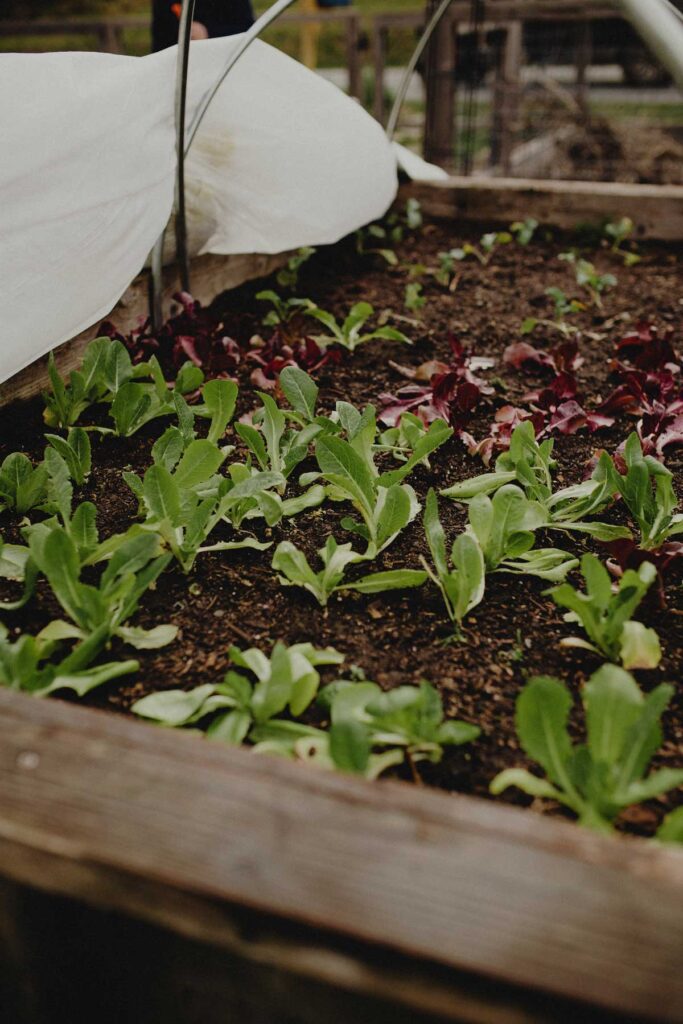
Planting in Soil Blocks
Planting seeds into soil blocks is similar to regular seed trays. The beauty is that you can separate blocks that have germinated more quickly than others without discarding or disrupting the entire tray.
- Follow the instructions on the seed packet for placement in necessary light exposure. Pro-Tip: For blocks, you only want to plant one seed per block. The seed blocker will leave a small hole in the center of each block. If the seed packet recommends covering the seeds, cover with a dusting of compost.
- Keep seeds damp by misting with a water bottle watering from the bottom of the soil block and moving up.
- Dependent on the size of the soil block you started with, you may need to block up (pot up) after the tiny seeds have germinated. Follow the same method above to create larger seed blocks with a larger seed-blocking tool or transplant them into another pot for further protected growth.
- When seedlings are ready to transplant into the garden, plant them in a well-fertilized area.
And there you have it! We’ve planted in soil blocks for years, and I doubt we’ll ever go back. They’re so simple, and when it comes time to transplant your plants into the garden, they’re easy to divide and plant.
More Posts You May Enjoy
- Soil Testing – Don’t Overlook This Crucial Step
- How to Grow More Food in Less Time (In Less Than 10 Hours A Week)
- Winter Garden Greenhouse
- How to Build a Drip Irrigation System
- Companion Planting with Asparagus and Strawberries
- Raised Garden Bed Plans
- Using Chickens for Garden Pest Control & Disease in Orchards
- Chickens in Garden Spaces to Till and Fertilize
- Hügelkultur Bed – A Natural Way to Garden