NOTE: Please be aware that this blog post contains photos of the chicken butchering process. If you’re uncomfortable seeing these images, this post isn’t for you!
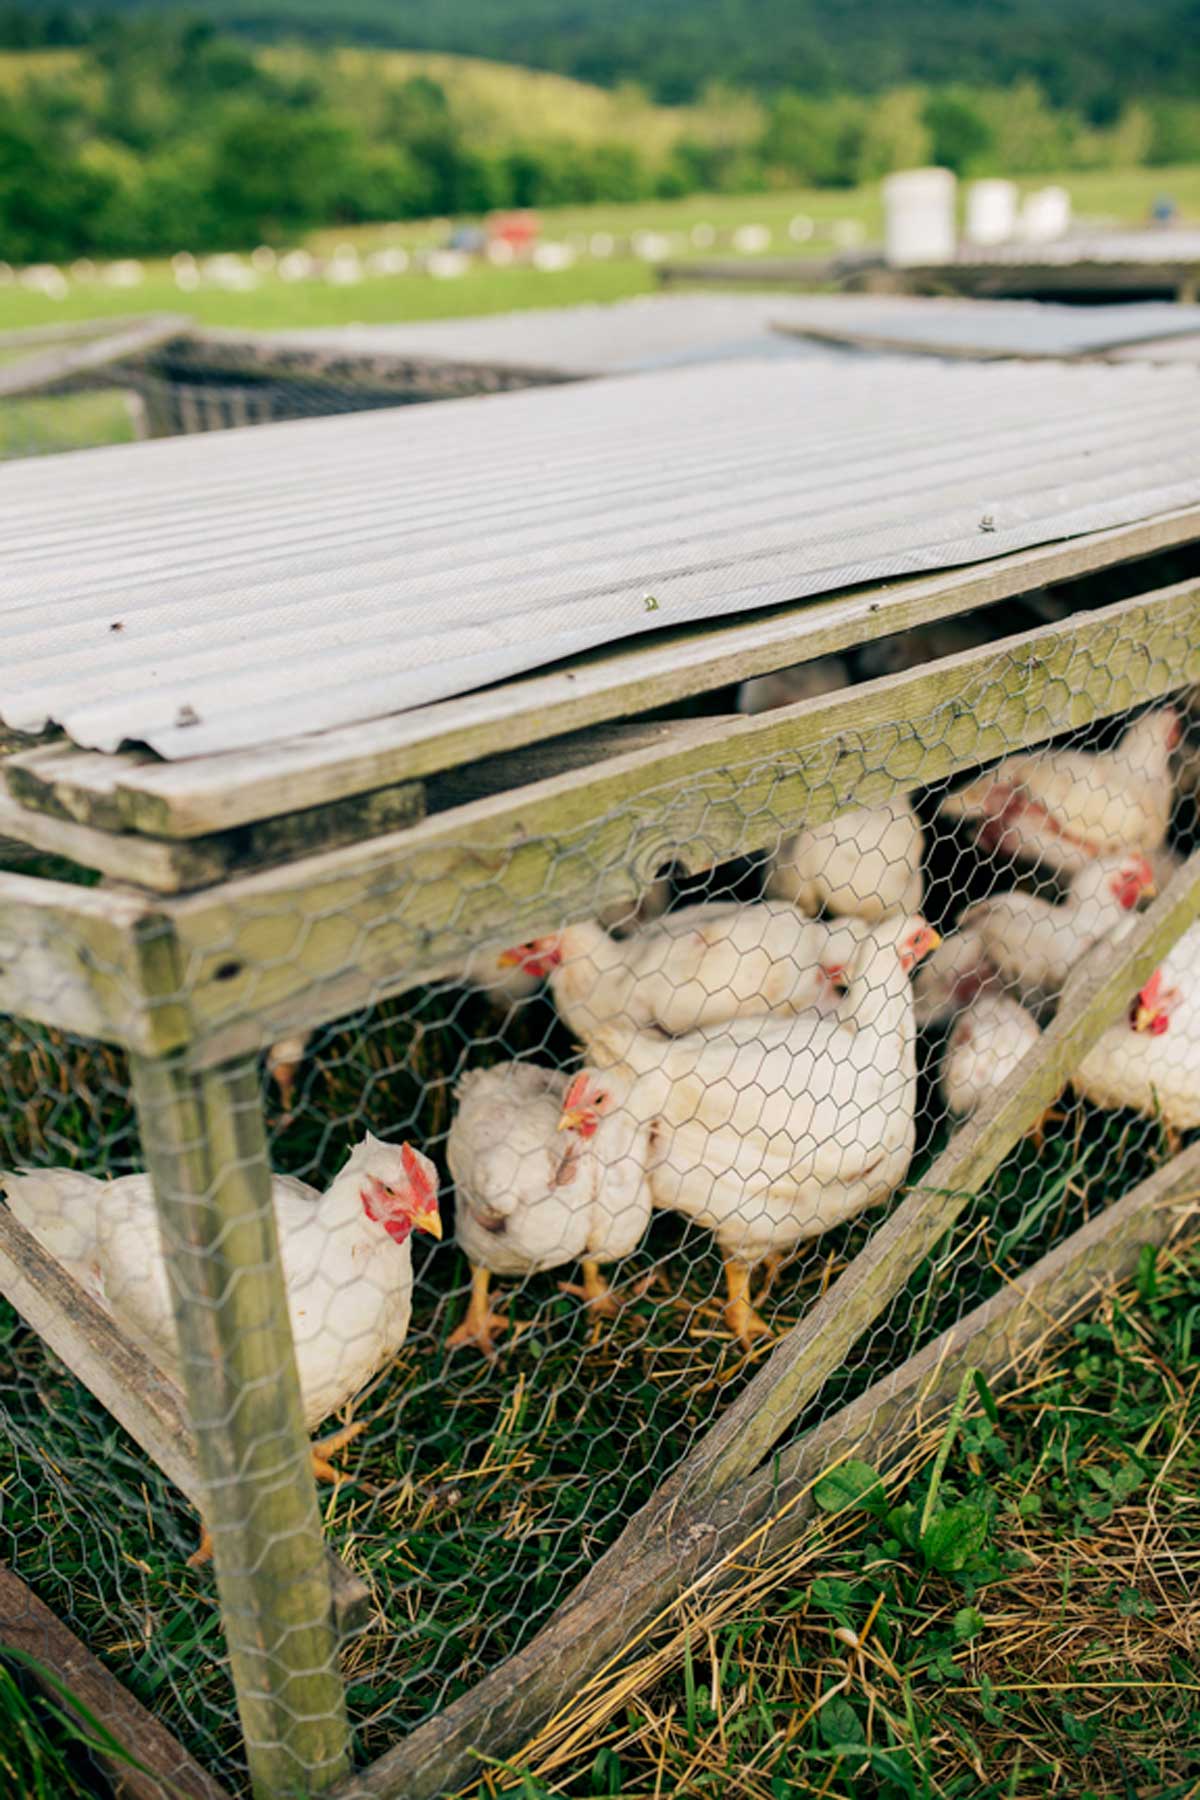
You’ve raised chickens from baby chicks to the brooder stage, learning how to raise and care for meat chickens, even utilizing a chickshaw for keeping them out at pasture.
Now it’s time to learn how to butcher your chickens. Processing our free-range chickens means a much better completion of the process for our meat than the factory alternative.
Follow along as I teach you how to butcher a chicken at home from beginning to end. Learn how to kill, pluck, clean, and skin it with or without expensive equipment. Video included for both methods!
How do you Humanely Slaughter a Chicken?
My mentor, Steve Meeks, taught me something I’ll never forget. Death is ugly and awful, but something dies every day so you and I can live. It may be a chicken, a head of lettuce or an oak somewhere in the forest, but things die so you can live.
Respect for the animal by treating it gently and calming it before killing it helps to ease the process for you and the bird. Death is not instantaneous, but it happens in seconds for chickens.
Equipment Methods
There is a lot of different equipment available for butchering whole chickens. What you choose to use will depend on the number of chickens you are butchering.
Supplies Needed for Minimalist Method
I’m sure our ancestors were pros at chicken butchering, and they got the job done with very few tools. You can use their minimalistic approach and fill your freezer with meat. They used the equipment available to them.
- Knife – A sharp knife is imperative for a safe and humane butchering process.
- Bucket – Used to drain the blood and innards.
- String – Rope, hay string, or twine work well to secure the bird.
- Large Pot – Filled with water and heated.
- Fire or Stove – Needed to heat the water.
- Water – Needed to scald the feathers and clean.
In modern times, we have way more equipment available to us. Using the minimalist approach will work just fine if you are butchering a small flock of 12-15 birds. However, if you have a lot of birds, you will save yourself a great deal of time and work if you purchase or borrow equipment.
Supplies Needed for Modern Approach
- Poultry Transport Cage – Used to store the live chickens while processing the others. Catching the chickens and having them available for easy access is essential for a smooth operation. The cage doesn’t have to be anything fancy. I’ve used a mobile pastured poultry pen next to where we’re processing. I’ve used an old cage I had laying around the farm for smaller numbers. For more convenience, you could opt for a poultry transport cage.
- Restraining Cones – These are also known as killing cones. They work great for holding the bird in place while killing, and they keep them in place if any nerves kick in after the kill and the bird begins to jump. This way, you don’t have a “chicken running around with its head cut off.”
- I believe the action of putting them upside down causes the blood to run to their head, creating a sedating effect. I also believe the “hugged” position of the chickens in the cones serves to calm their nerves.
- It’s very important to keep the chicken calm before the kill. A stressed-out chicken can mean a loss of glycogen levels which will negatively affect the taste, tenderness, color and quality of the meat.
- Sharp Knives – Knives are essential. If you only have one, I suggest an all-purpose boning knife about five to six inches long.
- Pruning Shears – Used for cutting off the head and neck. I like these high-quality Felco F-2 Class hand pruners.
- Waterproof Apron – This is so helpful for keeping your body dry. When you gut the chicken, it’s easy to get soaked with gut-infested water. I bit the bullet and bought this waterproof apron that’s easy to hose off at the end of the process.
- Waterproof Boots – You’ll be thankful for dry feet. I’ve been using an inexpensive set of these Servas, but I go through about two pairs a year. I would probably save money if I’d buy a more expensive pair. I’ve heard some good things about these Muck Boots from fellow permaculturists, so maybe I’ll try a pair of those next. Muck even has a one-year warranty!
- Buckets – Buckets are a classic essential on the farm, and they’re a critical element in this operation. You might be able to acquire used buckets from a grocery store or Craigslist. You can certainly buy them at a farm, garden or food supply store. Here are several ways you can use buckets for the slaughter:
- To catch the drainage from the sink.
- To catch blood underneath the restraining cones.
- For holding internal organs and other parts you aren’t keeping.
- To catch or store feathers.
- Scalder – This is another necessity that could be as simple as a large cooking pot over an outdoor fire. To make life easier, you could use an outdoor gas cooking stove for more control. An outdoor turkey fryer has one burner and would work great for scalding. To make life easiest, use this Dux Industries electric scalder. The main advantage of this scalder is that it can set your desired temperature and automatically maintain that temperature. You might consider a commercial-grade scalder if you’re a bigger operation and processing 50 or more chickens at a time.
- Liquid Soap – This is useful in your scalding water and will go a long way to easing the tension between skin and feathers, making the feathers come out easier. I just pour a bit of Shaklee Basic H, but any eco-friendly soap will do.
- Thermometer – A thermometer is useful for monitoring your scalding water temperature. Even if you’re using an electric scalder with an automatic setting, you’ll want to monitor the progress of the warm-up and double-check your temperatures throughout the process
- Scalding Poker – A scalding poker is a poking tool to move your chicken around in the scalder. If you’re saving the feet for chicken broth, you don’t want to scald the chicken by holding the feet because the feet will need a fair share of time in the scalding water. I use a handheld 3-pronged cultivator.
- Extension Cords – Needed to connect to your power source.
- Power Strip – Used to connect electric scalder and plucker.
- Chicken Plucker – This tool for plucking can make plucking a breeze. A plucker is optional and unnecessary if you’re only doing small amounts of birds or are willing to pluck by hand. It takes me about ten minutes to pluck one bird by hand, but I can pluck a chicken in my machine plucker in about 30 seconds. Some plucker options are:
- Drill Plucker -This will pluck one chicken at a time and would be somewhat of an upgrade if you’re doing it by hand.
- Drum Style Plucker – This will pluck one chicken at a time in about 30 seconds. I’ve pulled mine out for as little as just one bird and as many as 50. I personally use this plucker and believe it’s a great choice for the homestead level.
- Commercial Plucker – These will pluck three or more chickens at a time. This will save considerable time if you’re plucking a large number of birds. These are the pluckers Joel Salatin uses to process hundreds of chickens. Featherman makes a good commercial plucker.
- Large Cooking Pot – Filled with cold water, it is useful to quickly cool the bird after the scald, preventing it from scalding any further. A cooling pot isn’t totally necessary but will give you more control and doesn’t take that much effort.
- Sink and Processing Table – I can’t quite imagine butchering without this! For small operations, you could use your kitchen sink, but most prefer a designated sink for processing in any case.
- Hand Soap and Towels – Great at the sink to wash up if you need to take a break.
- Stainless Steel Bowl – Filled with ice cold water, it is great for separating and storing necks, organs and feet.
- Coolers – Filled with ice water used to quickly chill the finished chickens after they are butchered. This isn’t necessary if you’re only processing a few birds, but if you’re going to be out for a while, store your chickens in cool water.
- Transport Trays – Work great for transporting the chickens from the cooler if needed. I use stainless steel trays to transport birds inside to my wife, Rebekah, who dries them off and preps them for the fridge. We process more chickens than would fit in the cooler, so I make a few trips inside.
- Dry Rack or Towels – Used for drying the chicken before bagging it for storage.
- Vacuum Sealer – You will want to get the excess air out of the storage bags to prevent frost while in the freezer. This vacuum sealer is similar to the one we use.
- Bags – Needed for storing the birds. Make sure to buy bags suited to your vacuum sealer and large enough to fit your birds.
- Food Scale – Optional for weighing the finished birds if you like. I just use a small packaging scale. We always mark them by weight with a sharpie so we can plan our cooking times.
Preparing for Butchering Day
One Week Before Butchering
Make a checklist and order or pick up any supplies you might need before butchering day.
24 Hours Before or Early the Day of Butchering
Designate an area for processing that’s shady and has access to electricity and running water. Set up your processing area the day before or the early morning before slaughter and sharpen your knives.
12 Hours Before
Withhold feed from chickens to make sure their crop is empty. This is not a necessity but makes it easier and cleaner when processing. I just separate the chickens I’m going to butcher into a cage or a pastured poultry pen depending on how many I’m processing before I feed the morning of the butchering since the chickens don’t have feed at night.
2 – 4 Hours Before
Get your scalder going in plenty of time to get to your desired temperature. It can take several hours for an electric model or a fire to heat water up to 145° F, so plan accordingly.
How to Butcher a Chicken Step-by-Step
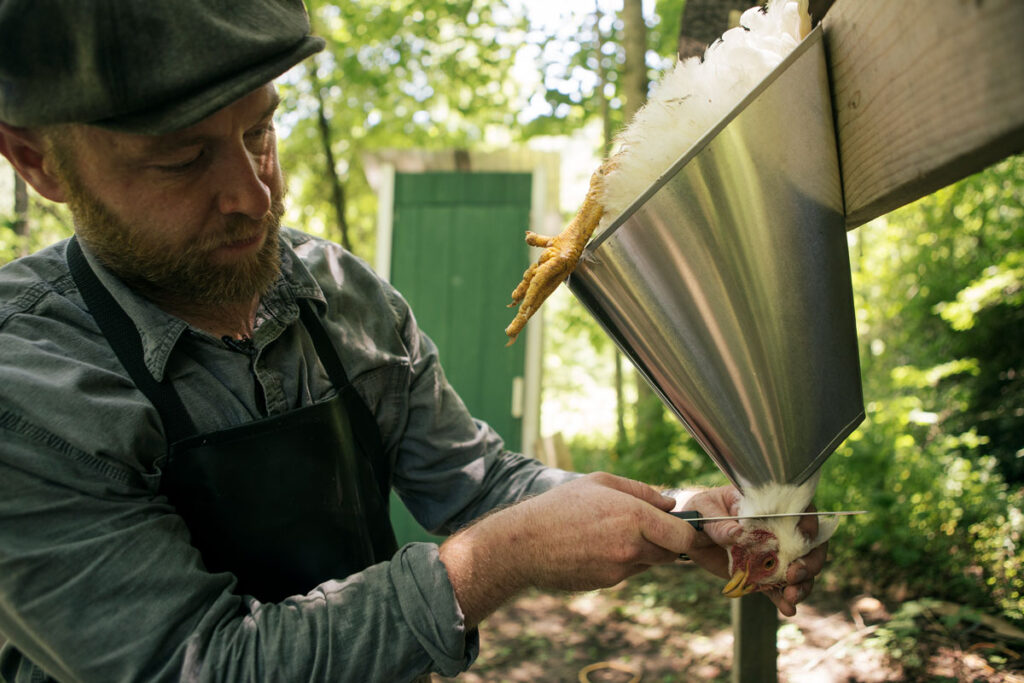
1. Place the chicken in the restraining cone and gently pull her head through the bottom. When using the minimalist method, secure the chicken’s legs with some string, and hang upside down against a wall (my barn worked well for this).
2. Hold the head with your subordinate hand and quickly slice into the side of the neck as close as you can get towards the cheekbone. This optimizes the amount of neck you can save. Be sure to slice hard enough to get through the skin and into the blood veins but not too hard as to begin cutting into the neck and/or windpipe. Once you’ve cut the major artery, they will lose consciousness and feel no more pain. The chicken’s nerves might kick in, and they will begin to jump, but rest assured, they are unconscious or even dead and don’t feel a thing.
3. Quickly slice the other side of the neck to encourage a quick bleed. Have you noticed purple, red and black spots inside of chicken meat from the grocery store? This is because they were most likely electronically stunned before they were allowed to bleed. Stunning will cause the heart to stop, therefore not allowing all the blood to get out of the meat.
4. Bend the chicken’s head to encourage bleeding and hold her head steady if her nerves cause her to shake. If there’s lots of blood coming out, you’ve made a successful kill. If not, you’ll need to quickly slice again until sufficient blood flows. She’ll bleed a lot initially but will slow significantly after the first few seconds and will trickle to 3 minutes.
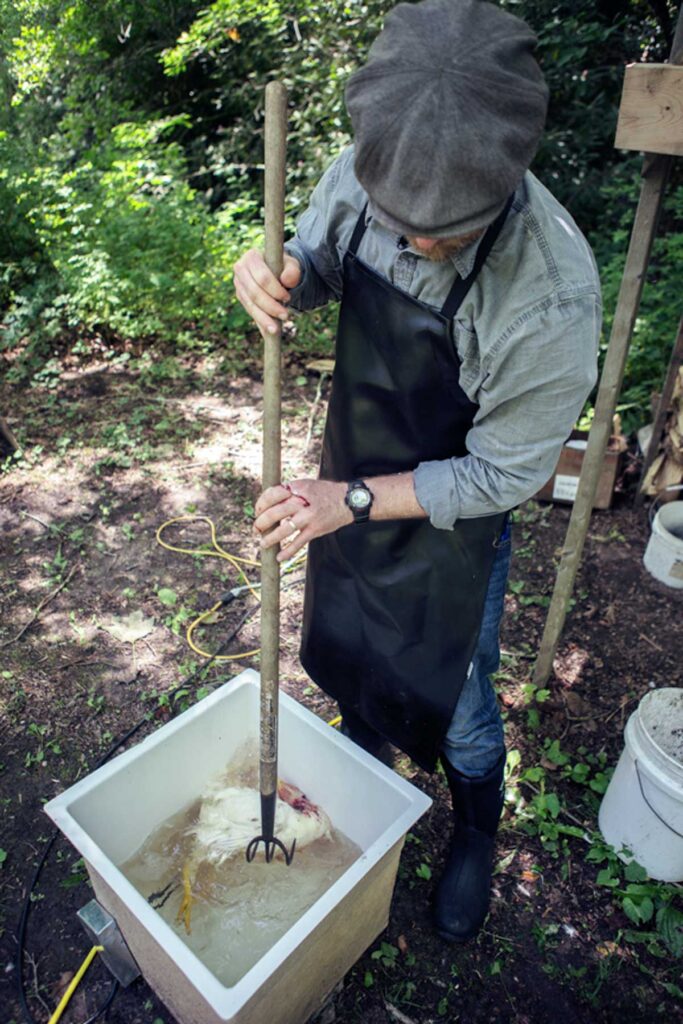
5. Place your chicken in scalding hot water. Notice I didn’t say boiling water. I like a temperature of about 145° F.
6. Thoroughly and evenly scald by moving the chicken around with your poking device. At 145° F it takes 30 seconds to a minute. You can test the bird during the scald by peeling at her feet and/or wings. The scald is good if her feet easily peel and the wing feathers easily come out. If you don’t scald long enough, it will be more difficult to pluck. If you scald for too long, your chicken’s skin will begin to cook and might begin to peel and be discolored (yellowish).
7. Dip the scalding chicken into a pot of cool water to stop the cooking process.
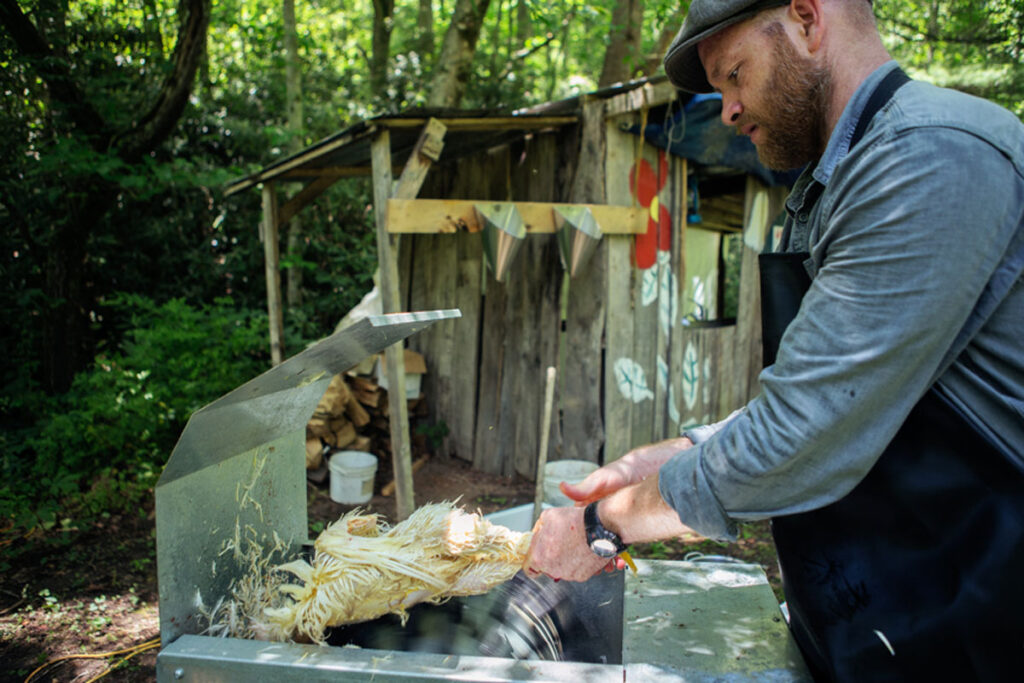
8. Pluck the chicken by hand or speed up the work significantly with a machine (up to 10X faster).
9. Pick off any excess hair or pin feathers.
10. Pull the skin off of the feet.
11. Remove the toenails by bending and pulling against the curve.
12. Cut off the leg by cutting between the joints. Lifting the chicken can help reveal the joint.
13. Pull or cut off the head with your shears.
14. If you’re going to save the head for cooking, rub the coating off the comb and wattles and pinch the beak to pull off the cuticle.
15. Singe if desired. You’ll notice small hairs are likely to remain on the carcass. You can remove them by hand or with a singe torch. However, there’s no harm in keeping them. I manually pull out any major patches, but other than that, I don’t worry about it.
16. Cut the skin around the base of the neck to reveal the crop. Peel the crop downward off of the breast bone.
17. Put your thumb through the neck between the neck, crop, esophagus and windpipe and pull the crop and skin off.
18. Cut the tubes close to the body.
19. Cut the neck with your shears angled down from the body, so there are no bones to pierce future storage bags.
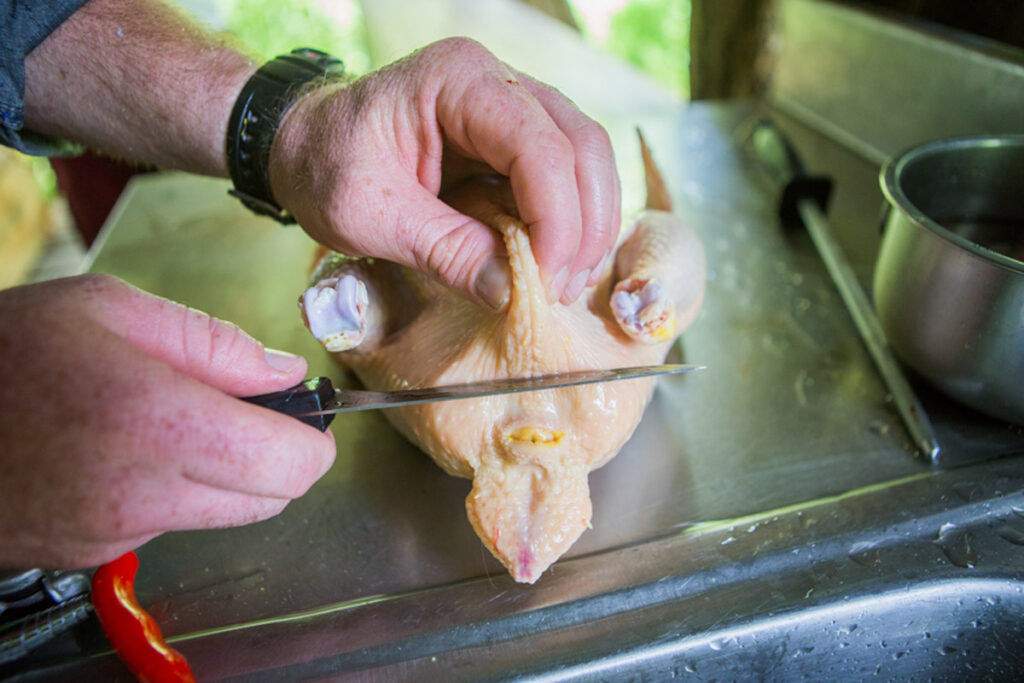
20. Cut the oil gland off by slicing down and out.
21. Make a small slit through the abdomen skin as close as possible to the vent so as not to cut any entrails. Accidentally cutting the entrails could mean cutting into the intestines and spilling out the bacterial-ridden material.
22. Open the carcass using both hands.
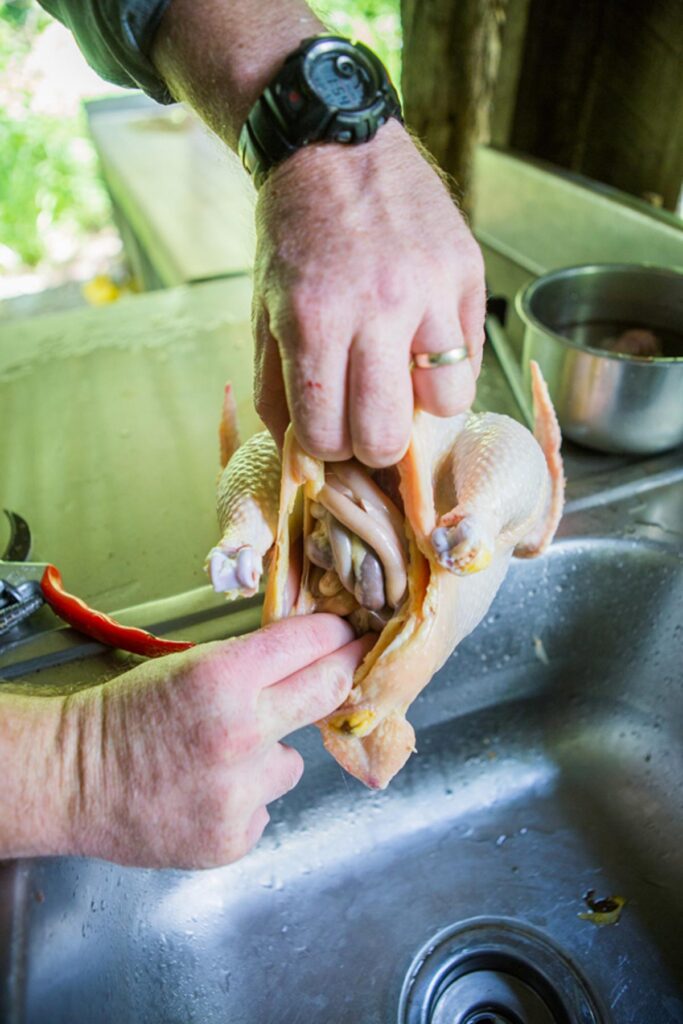
23. Reach in, scraping against the rib cages with your fingernails, loosening the entrails from the body. Some folks may prefer to use latex gloves for this.
24. Hook the esophagus in your finger or just grab behind the entrails and pull them out altogether.
25. Rest the chicken on the sink counter while hanging the entrails into the sink. With the help of gravity, cut off the heart and liver. I sacrifice some of the liver so as not to cut the bile duct. If you cut the bile duct, it’s no disaster, just quickly rinse the bird.
26. Put the heart and liver into your stainless steel bowl of cold ice water, if you’re saving them.
27. Cut away the gizzard. If you’re saving the gizzard, cut it open long ways from one end, remove the insides and the yellow lining, rinse, and set aside.
28. Save the testicles from males for consumption, if desired. The head, neck, gizzard, feet, testicles, and liver are all edible and considered delicacies in many countries.
29. Cut away the entrails, getting as close as possible to the vent to save as much fat as you can.
30. Pull the lungs out. This can be a bit tricky and is hard to explain. Reach in and dig into the rib cage, scraping the lung with your fingernails to pry them out.
31. Rinse your bird and place it in the cooler.
Cutting the Bird into Pieces
If you want to go ahead and part your bird, here’s how to do it quickly and easily.
- Cut the Wings – Cut by turning the bird on its side, pulling the wing away from the body. Pull on the wing while you cut a half circle around the wing. The wing should start to separate as you pull and cut, and you’ll easily see where you can cut below the bone to remove the wing. I try to cut as close as I can to the wing as I’d rather have the extra meat on the breast, not the wing.
- Cut the Skin – Cut between the legs and the body by laying the chicken on its back and cutting it as close as possible along the leg. Cutting close to the leg assures maximum skin coverage for the breast. I prefer to sacrifice a little skin on the leg instead of the breast.
- Cutting Legs – Take both legs of the chicken to reveal the area between the joints for your next cut. Separate the leg from the thigh by cutting through the fat line.
- Remove the Back – Remove the back by cutting down the fat line, then bending and pulling to break and remove.
- Breastbone – Turn the breast over, revealing the bone. Score the bone at the center. Pop out the keel bone by bending the breast upward and prying it out. Cut the breast in half.
- Storing the Finished Chicken – Dry off your chicken with towels. Place in freezer bags and vacuum seal. Weigh and label. Place in the fridge for three days to tenderize the meat, and then stick it in the freezer for long-term storage.
Cleanup after Butchering
Now that you’re finished butchering, I should mention how to get rid of all the unwanted goods.
Feed the feathers to the chickens or compost them. Feathers are full of protein. What the chickens don’t eat will decompose, adding to your deep litter coop or run.
Compost the entrails, blood, and any other unused parts by burying them deep inside a compost pile. You must put them in deep or unwanted animals will dig out your pile.
Another option is to dump the excess at the edge of your property to feed your predator population, which helps to satisfy their hunger on something other than your live chickens.